How to Update VMware ESXi 6.x in Online Mode
Learn how to update a VMware ESXi 6.x host using the VMware online depot.
This post explains how to update a VMware ESXi 6.x host to a newer version using the VMware online depot.
In this example, I update an ESXi host to ESXi 6.5.0a. You can read the VMware ESXi 6.5.0a release notes for more information.
You can also review the ESXi 6.5.0 version history to see additional releases.
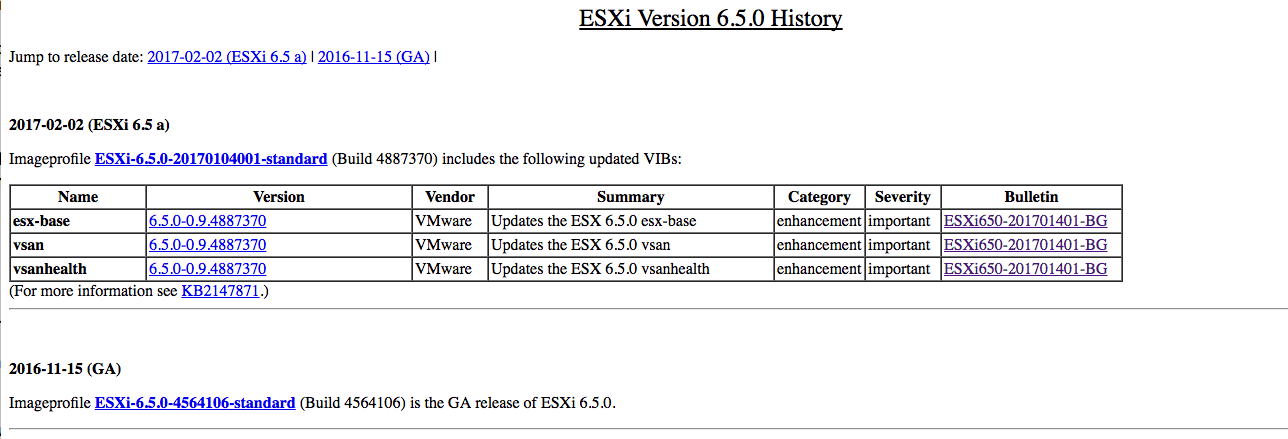
Update Methods
There are two common ways to update an ESXi host:
- Offline mode: Download the update ISO or offline bundle and make it available to the ESXi host through a datastore, iDRAC, IPMI, KVM, iLO, or another remote-management solution. The update is then installed manually.
- Online mode: Connect to the VMware online depot and update the host directly with the
esxclicommand.
This post covers the online update method. For the offline procedure, see How to Update VMware ESXi 6.x in Offline Mode.
Before You Start
Before beginning the update:
- Verify that you have a reliable backup of your virtual machines and important data.
- Confirm that the server hardware is compatible with the target ESXi version by checking the VMware Compatibility Guide.
- Make sure the ESXi host has internet access.
- Schedule maintenance downtime because the update requires a host reboot.
- Confirm that the required VMware depot and ESXi profile are still available for your environment.
Important: This procedure uses an older ESXi release and VMware depot URL. ESXi 6.x is no longer a current supported release. Use the applicable VMware/Broadcom lifecycle documentation and supported update method for modern environments.
Update the ESXi Host
Enter Maintenance Mode
Place the ESXi host into maintenance mode:
- Open the ESXi Host Client.
- Select the host.
- Right-click the host.
- Select Enter maintenance mode.
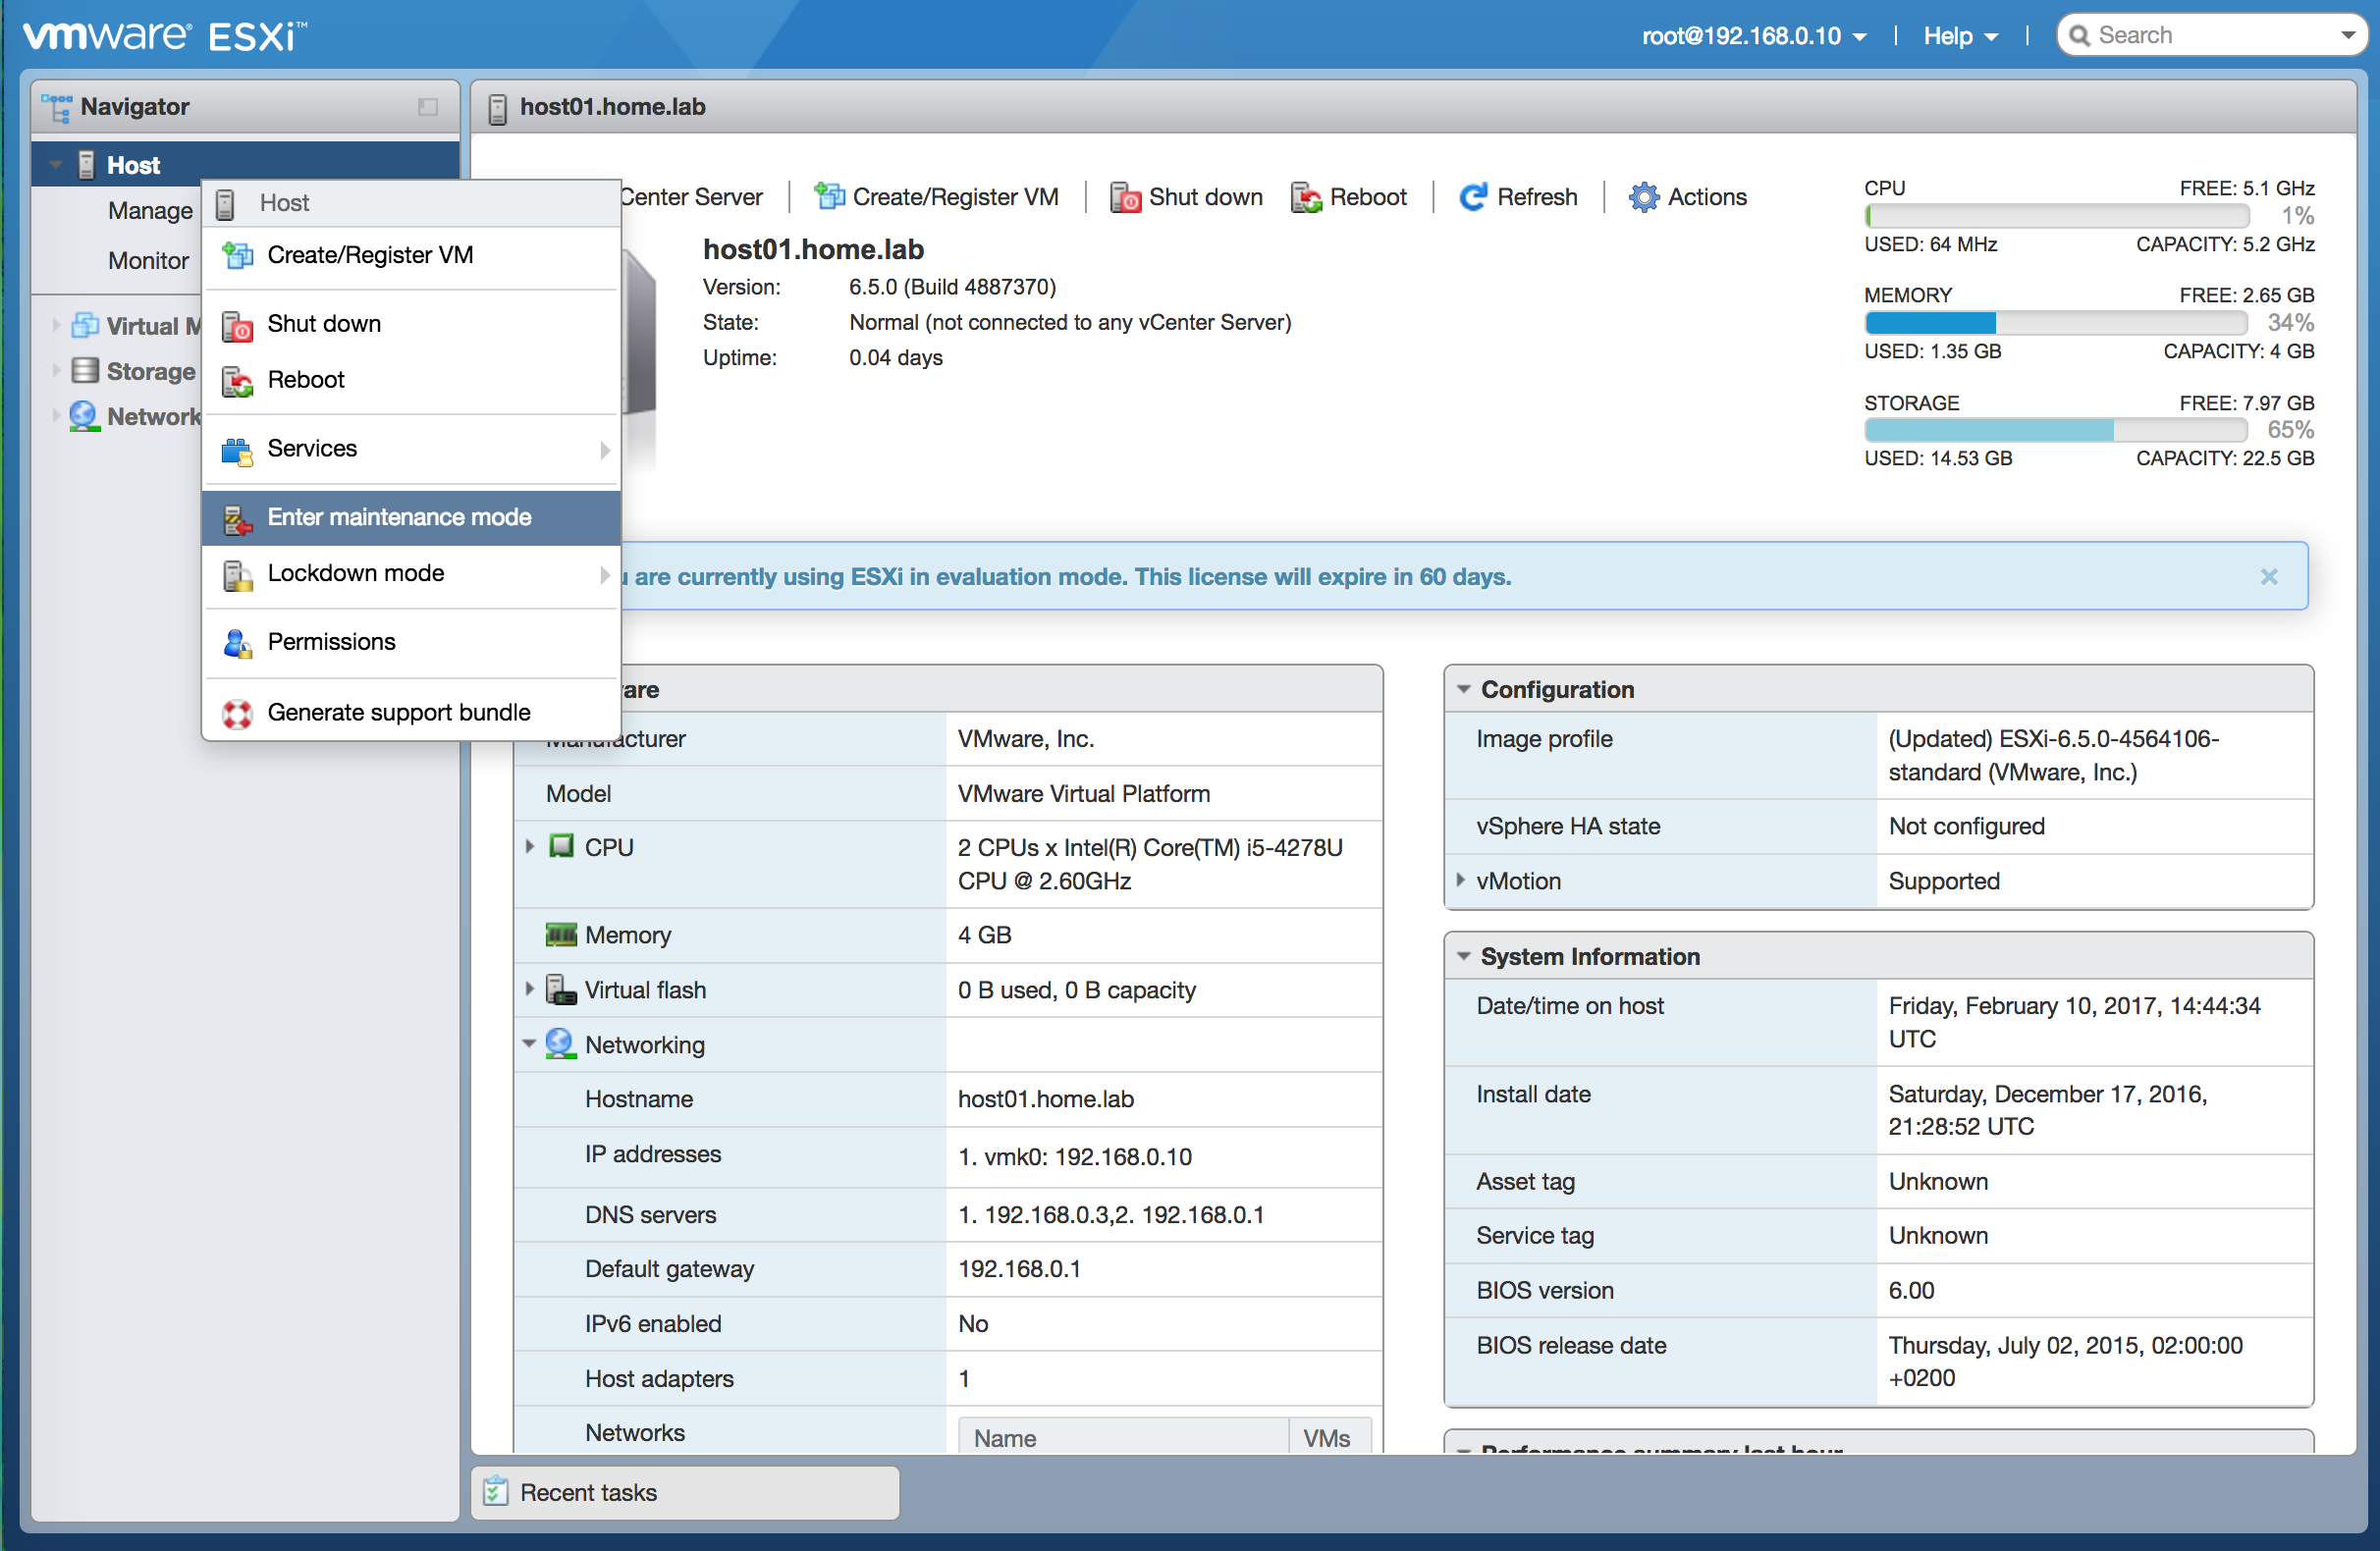 Enter maintenance mode.
Enable SSH
Open an SSH session to the ESXi host using your preferred SSH client, such as PuTTY.
If SSH is not enabled, start it from the ESXi Host Client:
- Select Host.
- Select Manage.
- Open the Services tab.
- Locate
TSM-SSH. - Start the service.
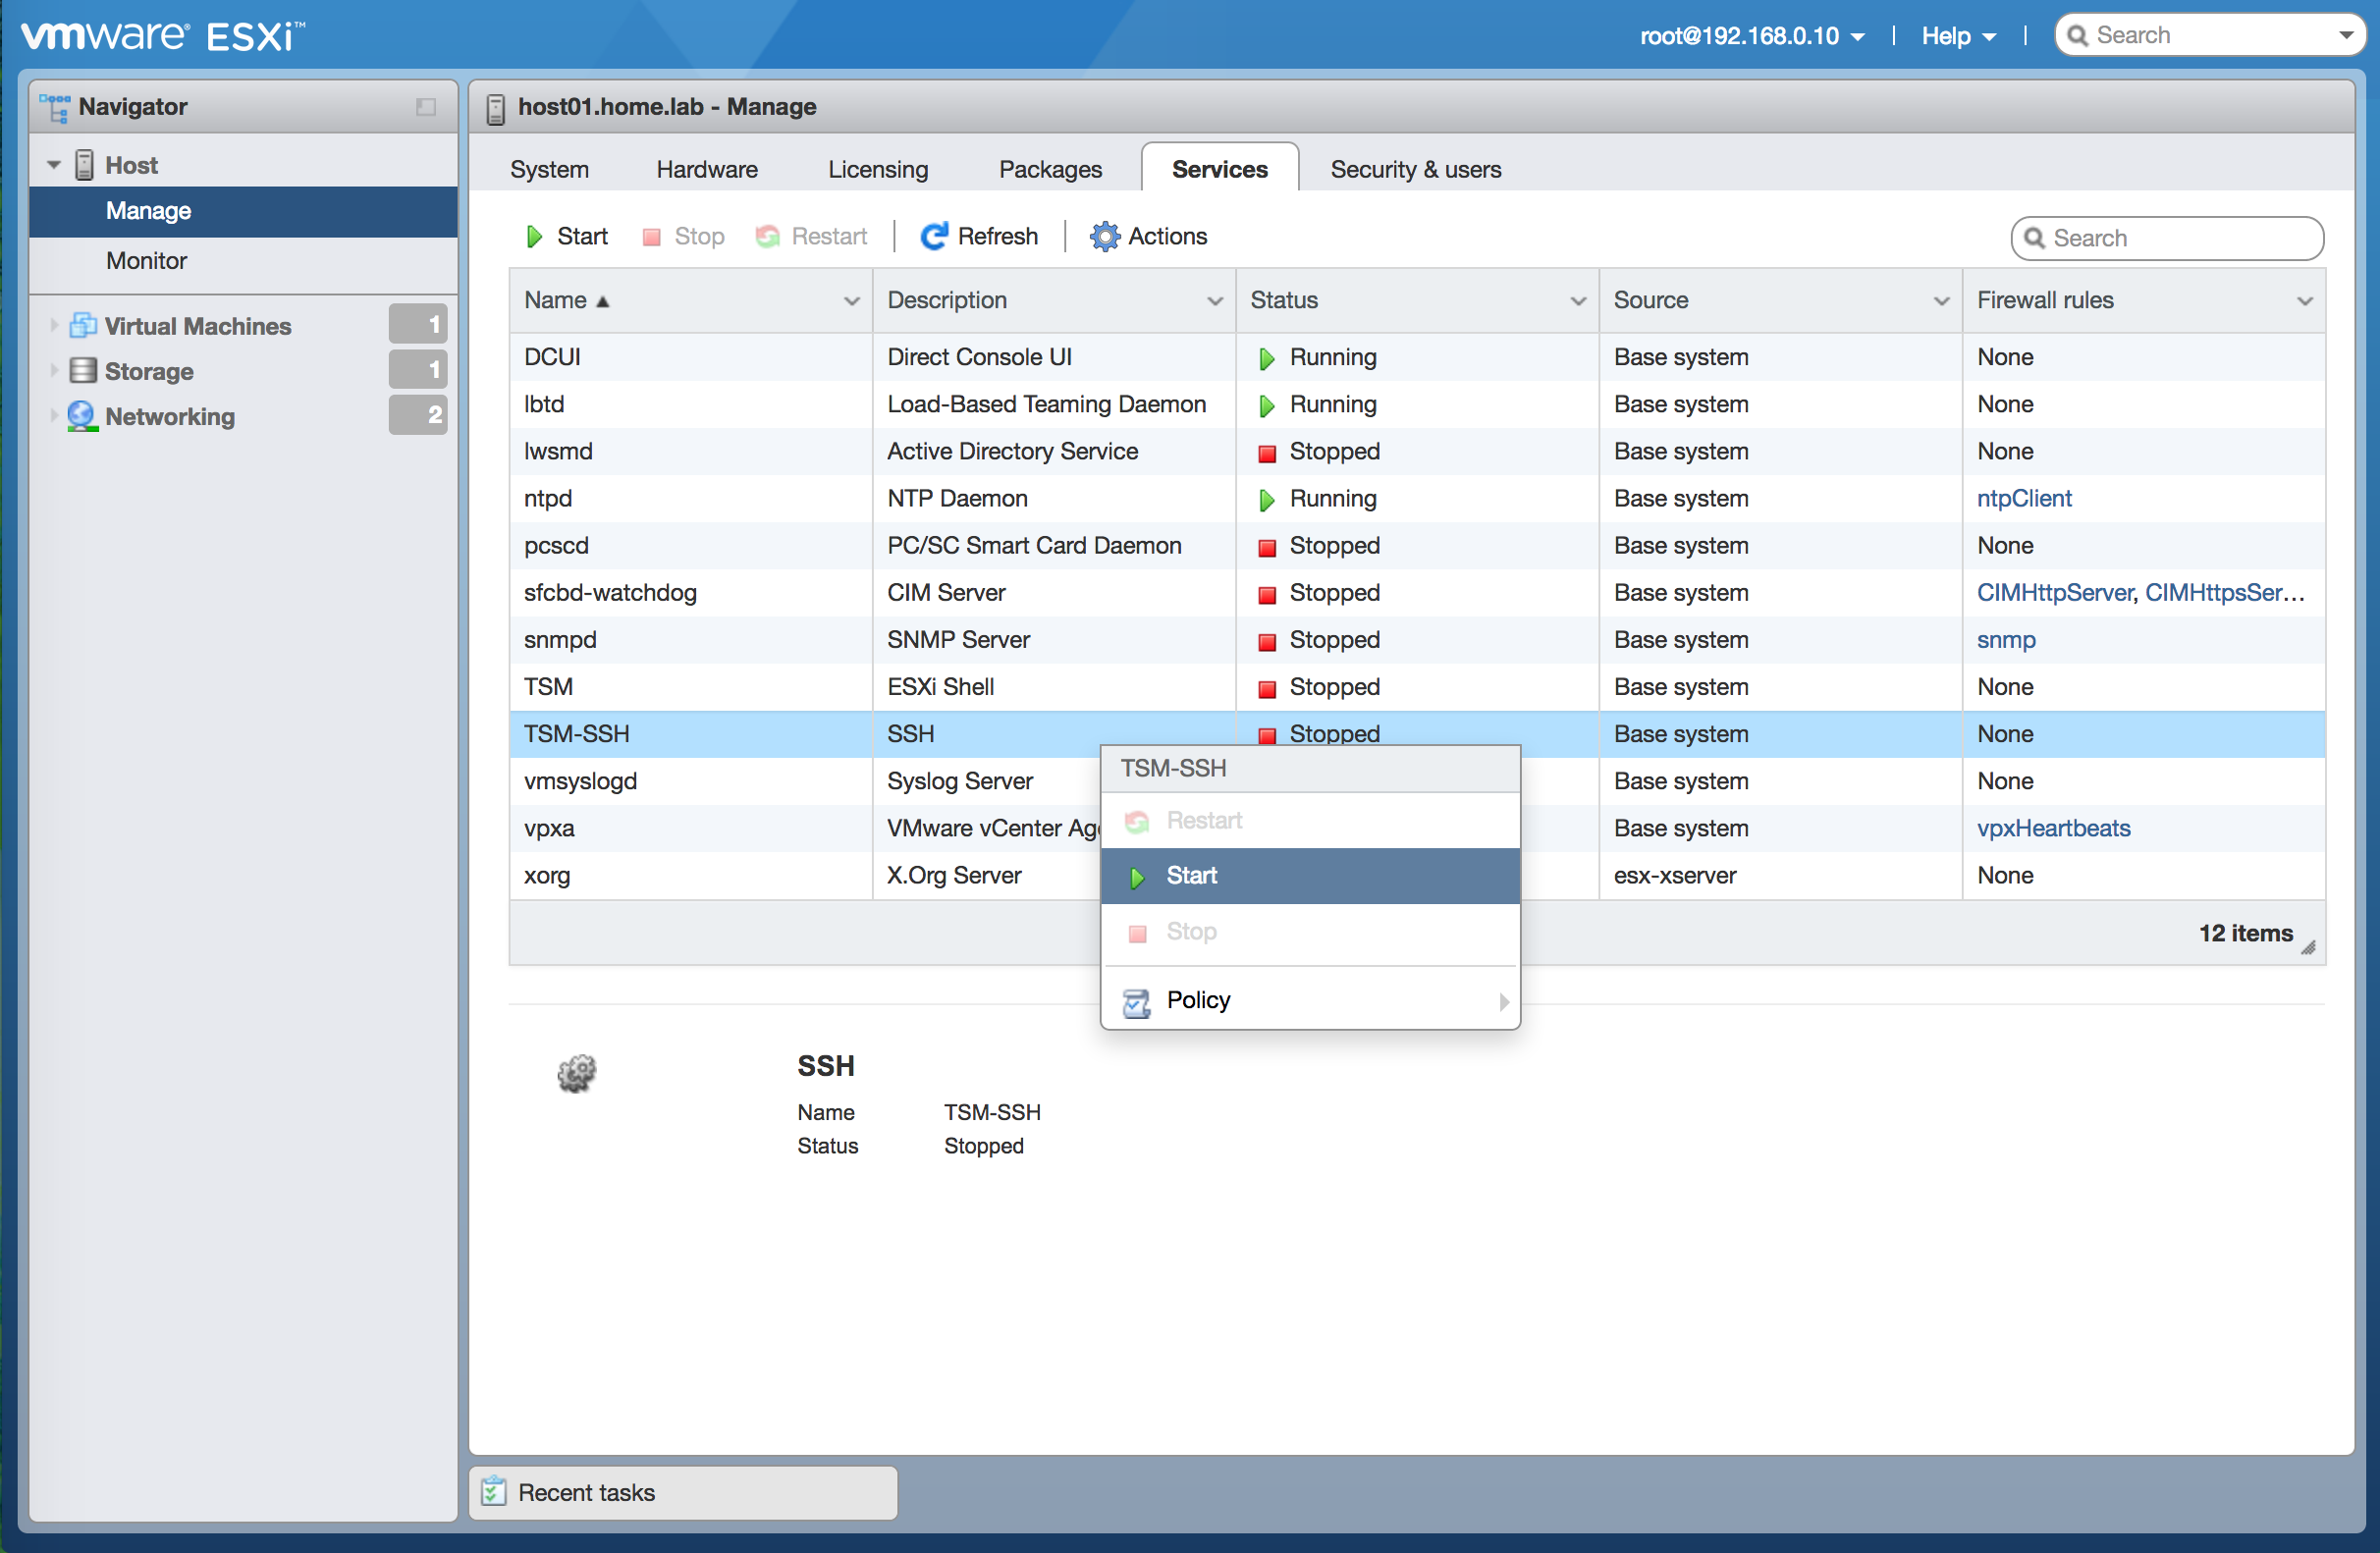 Enable the SSH service.
Security recommendation: Enable SSH only for the duration of the maintenance task. Stop the service after completing the update.
Check the Current Version
Display the installed ESXi version and build number:
1
vmware -vl
Record the current version and build number so that you can compare them after the update.
List Available ESXi Profiles
To list the available ESXi image profiles in the VMware online depot, run:
1
2
esxcli software sources profile list \
  --depot=[https://hostupdate.vmware.com/software/VUM/PRODUCTION/main/vmw-depot-index.xml](https://hostupdate.vmware.com/software/VUM/PRODUCTION/main/vmw-depot-index.xml)
Review the output and identify the profile that matches the desired ESXi release.
Enable the HTTP Client Firewall Rule
The ESXi firewall may block HTTP connections from the host by default. Enable the httpClient ruleset before connecting to the VMware depot:
1
esxcli network firewall ruleset set -e true -r httpClient
Update the ESXi Host
Run the following command to update the host with the selected image profile:
1
2
3
esxcli software profile update \
  -p <ESXI_IMAGE_PROFILE> \
  -d [https://hostupdate.vmware.com/software/VUM/PRODUCTION/main/vmw-depot-index.xml](https://hostupdate.vmware.com/software/VUM/PRODUCTION/main/vmw-depot-index.xml)
For this example:
1
2
3
esxcli software profile update \
  -p ESXi-6.5.0-20170104001-standard \
  -d [https://hostupdate.vmware.com/software/VUM/PRODUCTION/main/vmw-depot-index.xml](https://hostupdate.vmware.com/software/VUM/PRODUCTION/main/vmw-depot-index.xml)
The update may take several minutes. The command may not display progress for some time, so do not interrupt it while the update is running.
After the update completes, review the output for errors and confirm that the operation finished successfully.
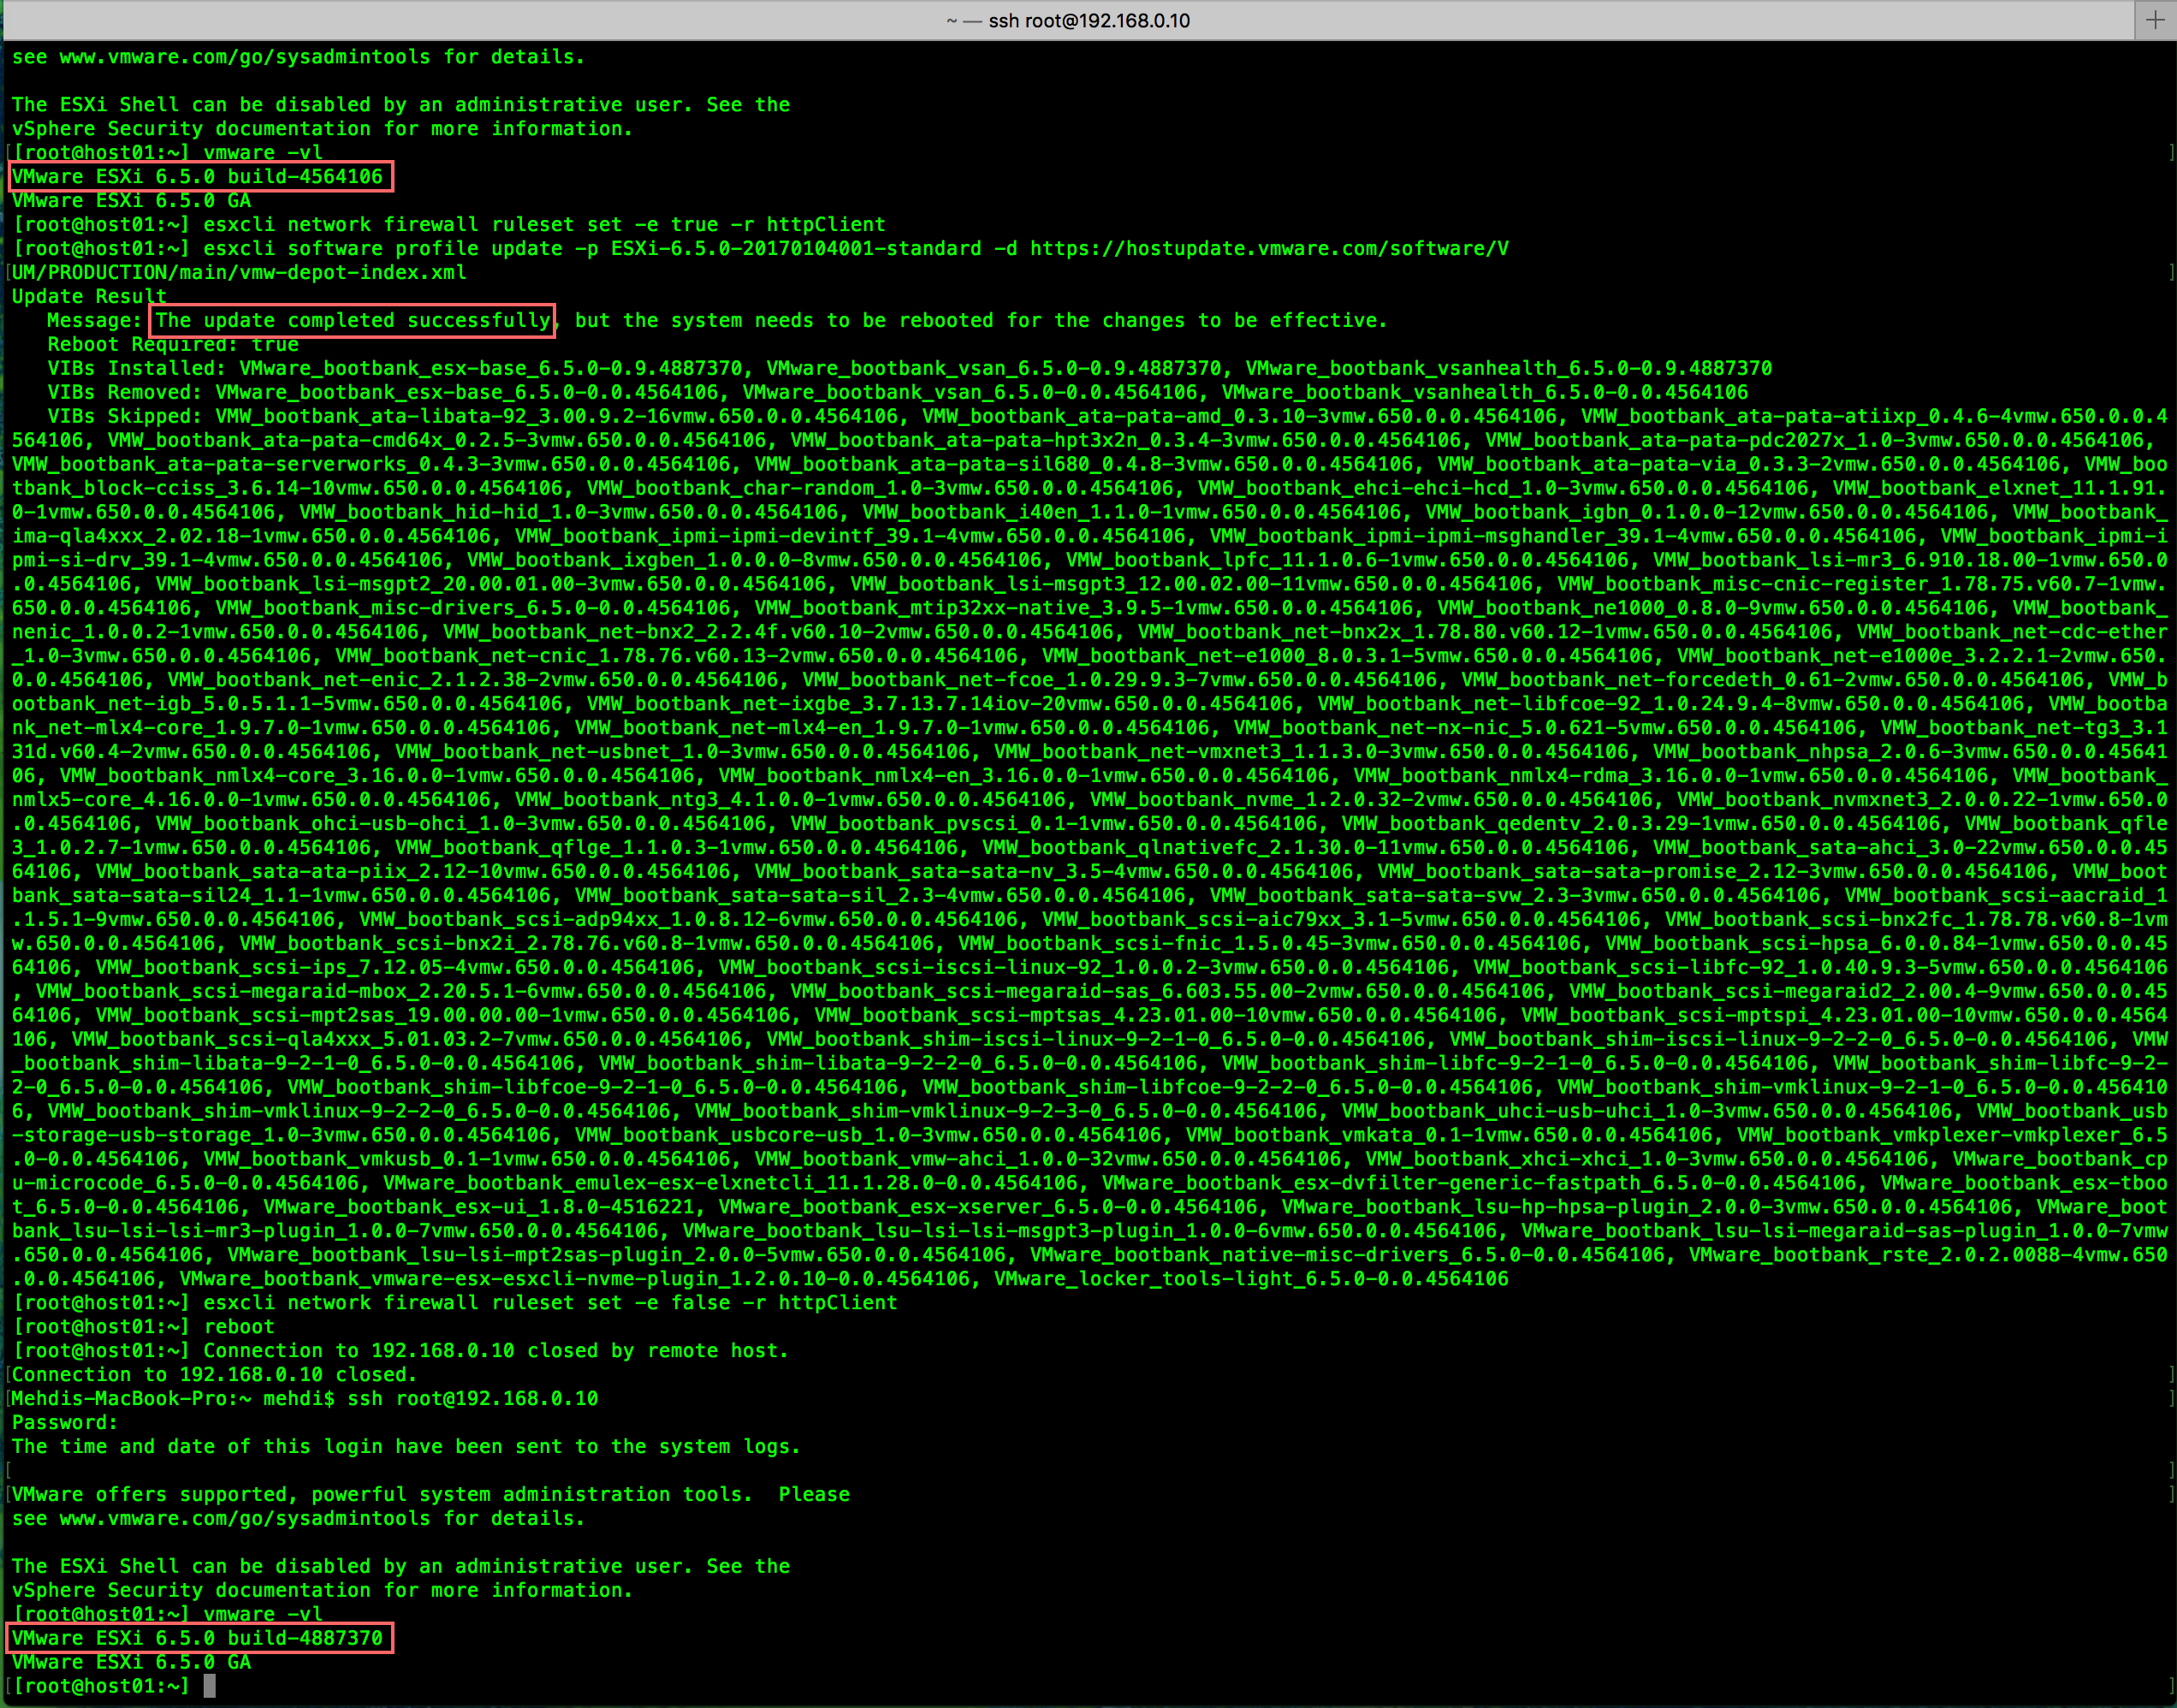 Update completed successfully.
Disable the HTTP Client Firewall Rule
After the update finishes, disable the HTTP client firewall rule again:
1
esxcli network firewall ruleset set -e false -r httpClient
Reboot the ESXi Host
Reboot the ESXi host to activate the updated components:
1
reboot
You can also reboot the host from the ESXi Host Client.
After the host has restarted, exit maintenance mode through the Host Client.
Verify the Update
Reconnect to the ESXi host and check the version and build number:
1
vmware -vl
The build number should now match the target ESXi image profile.
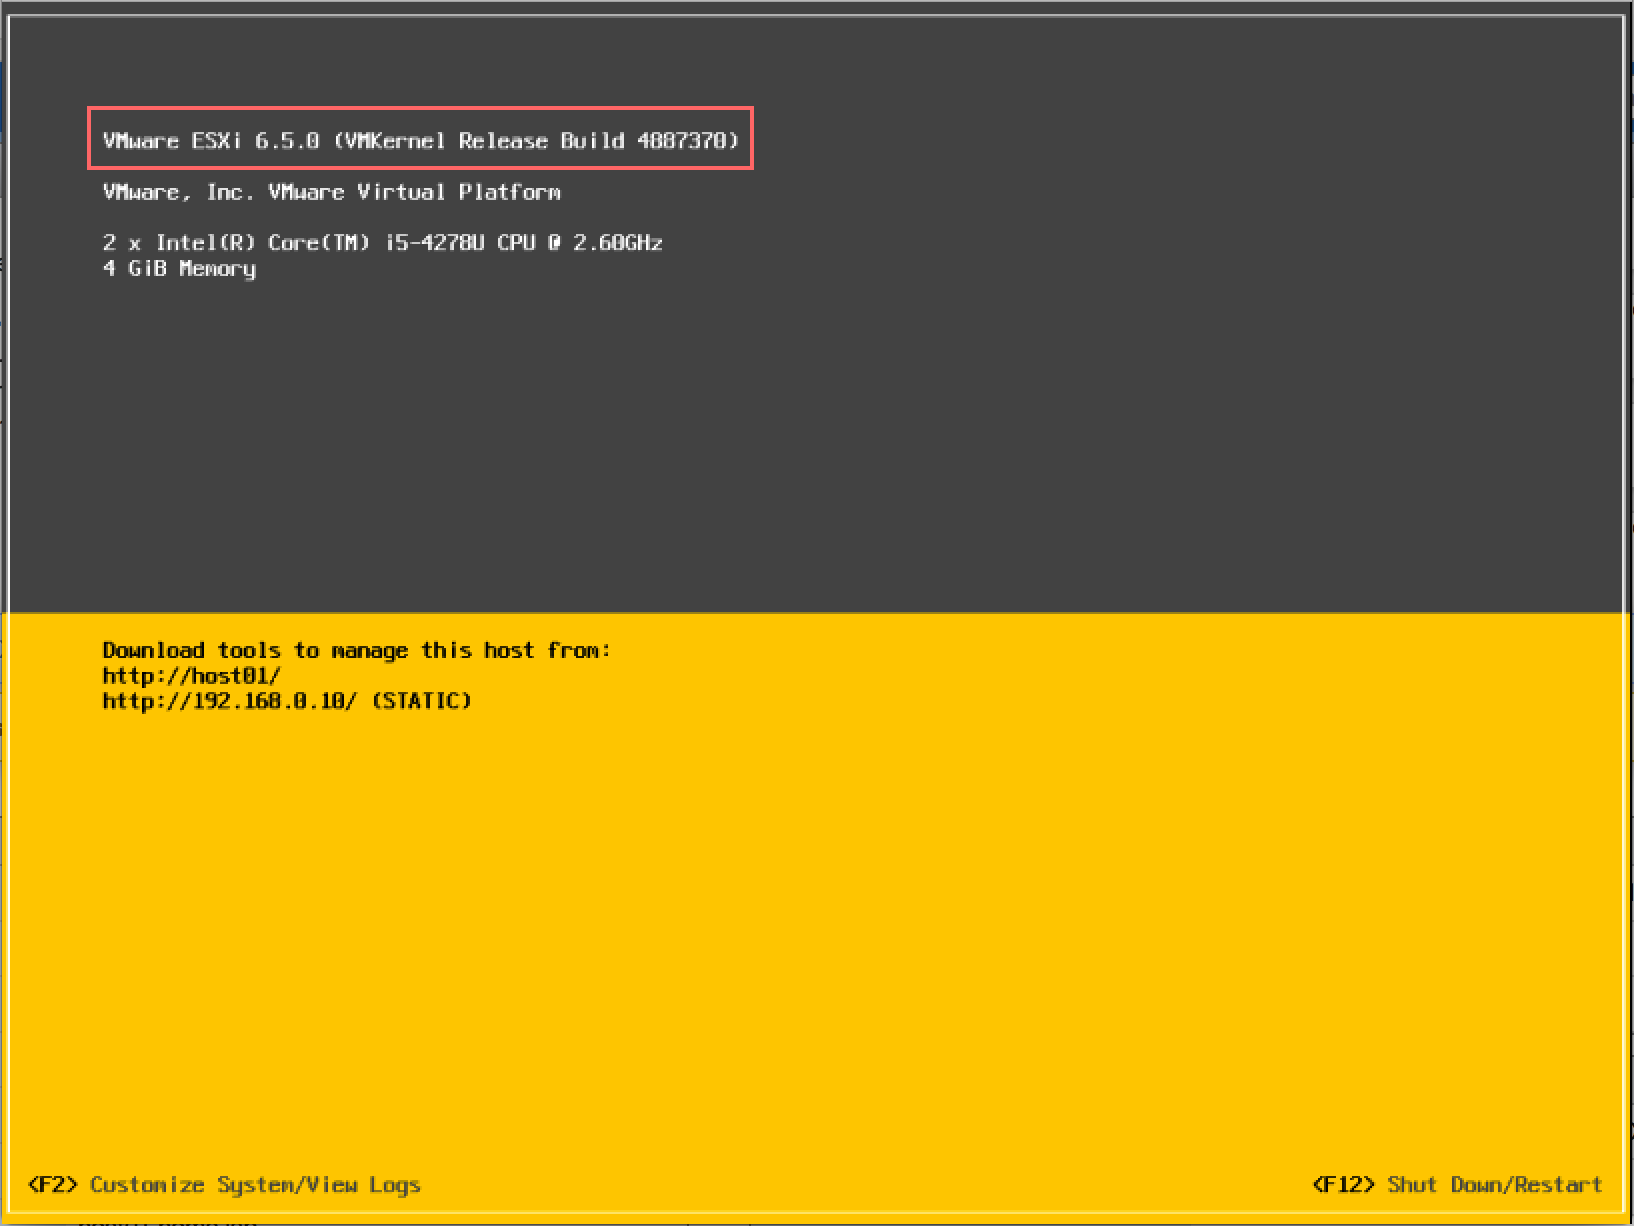 ESXi build number after the update.
After verifying the update:
- Confirm that the ESXi host is connected and healthy.
- Exit maintenance mode.
- Verify network connectivity.
- Confirm that datastores are accessible.
- Power on the virtual machines if necessary.
- Verify that the virtual machines and applications are operating normally.
- Disable SSH if it is no longer required.
The online update procedure is straightforward, but always test the update in a lab or non-production environment first whenever possible.
Update — 26.02.2017
I published a separate post about updating the ESXi hypervisor in offline mode: