Add a New Disk and Partition to Your Linux Server
Learn how to partition, format, mount, and permanently configure a new disk on a Linux server.
Adding a new disk to an existing Linux server is a common administration task. This guide explains how to detect a new disk, create a partition, format it with the ext4 filesystem, mount it, and configure it to mount automatically after a reboot.
This post focuses on a locally attached disk. NFS partitions and network-mounted filesystems are covered separately.
Warning: The partitioning and formatting steps can permanently destroy data. Confirm the correct disk device before running any partitioning or formatting command.
Check the Current Partitions
To display the disks and partitions currently detected by the Linux server, run:
1
sudo fdisk -l
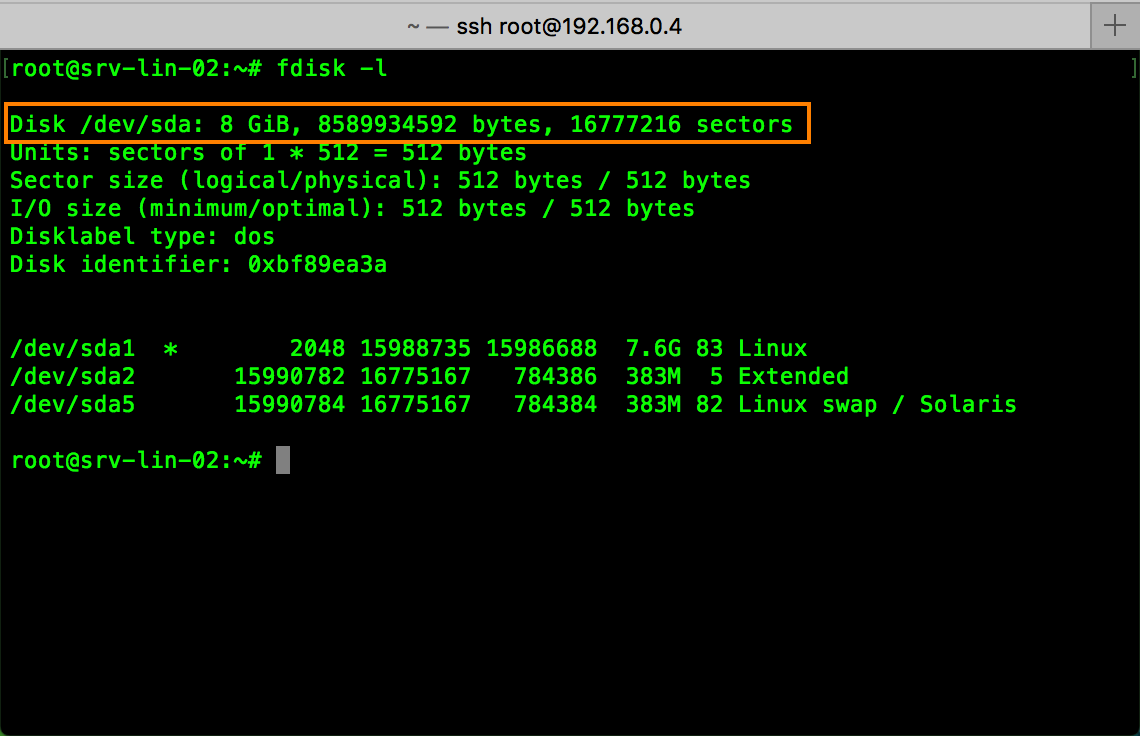 Current disk and partition layout.
Linux Device Naming
Linux uses device names to identify disks, partitions, and other storage devices.
The following examples describe common device names:
/dev/fd0: First floppy disk drive./dev/fd1: Second floppy disk drive./dev/sda: First SCSI or SATA disk./dev/sda1: First partition on the first SCSI or SATA disk./dev/sda2: Second partition on the first SCSI or SATA disk./dev/sdb: Second SCSI or SATA disk./dev/scd0or/dev/sr0: First SCSI CD-ROM or optical drive./dev/hda: Primary disk on the primary IDE controller./dev/hdb: Secondary disk on the primary IDE controller.
For additional information, see Ubuntu Linux Terms for Your Hard Drive and Devices Explained.
In this example, the server has one 8 GB SATA disk containing three system partitions. I added an additional 5 GB disk and then checked the disk layout again.
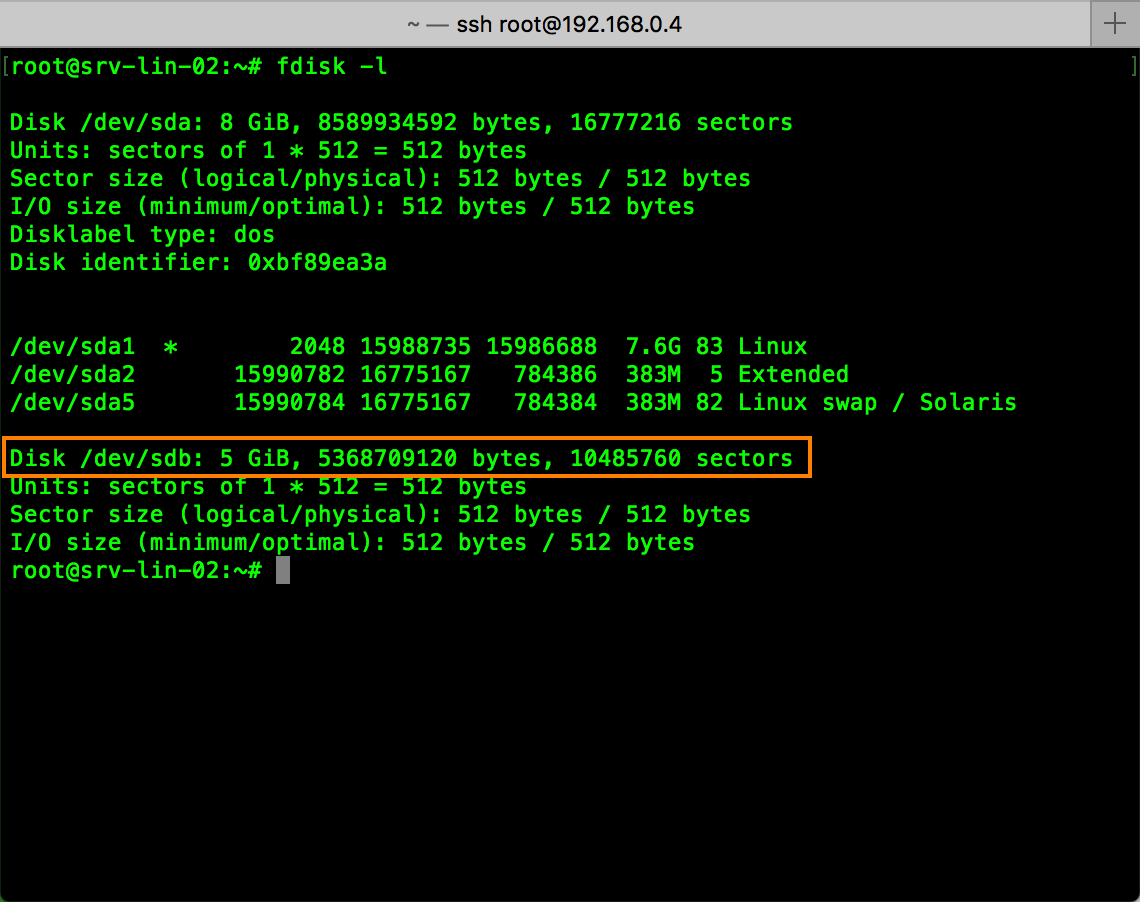 New disk detected by Linux.
The new disk is detected as:
1
/dev/sdb
Create a New Partition
Use cfdisk to create a partition on the new disk:
1
sudo cfdisk /dev/sdb
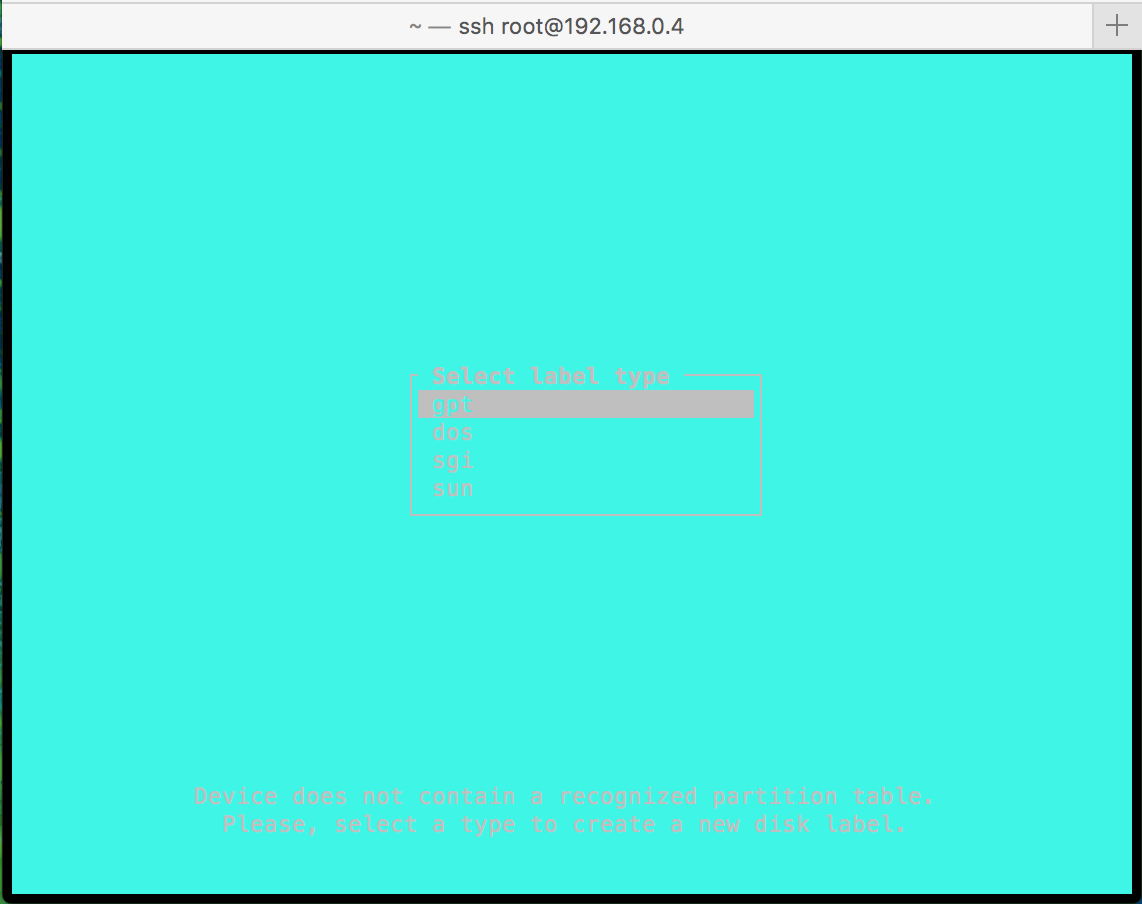 Select the partition table type.
Select:
1
dos
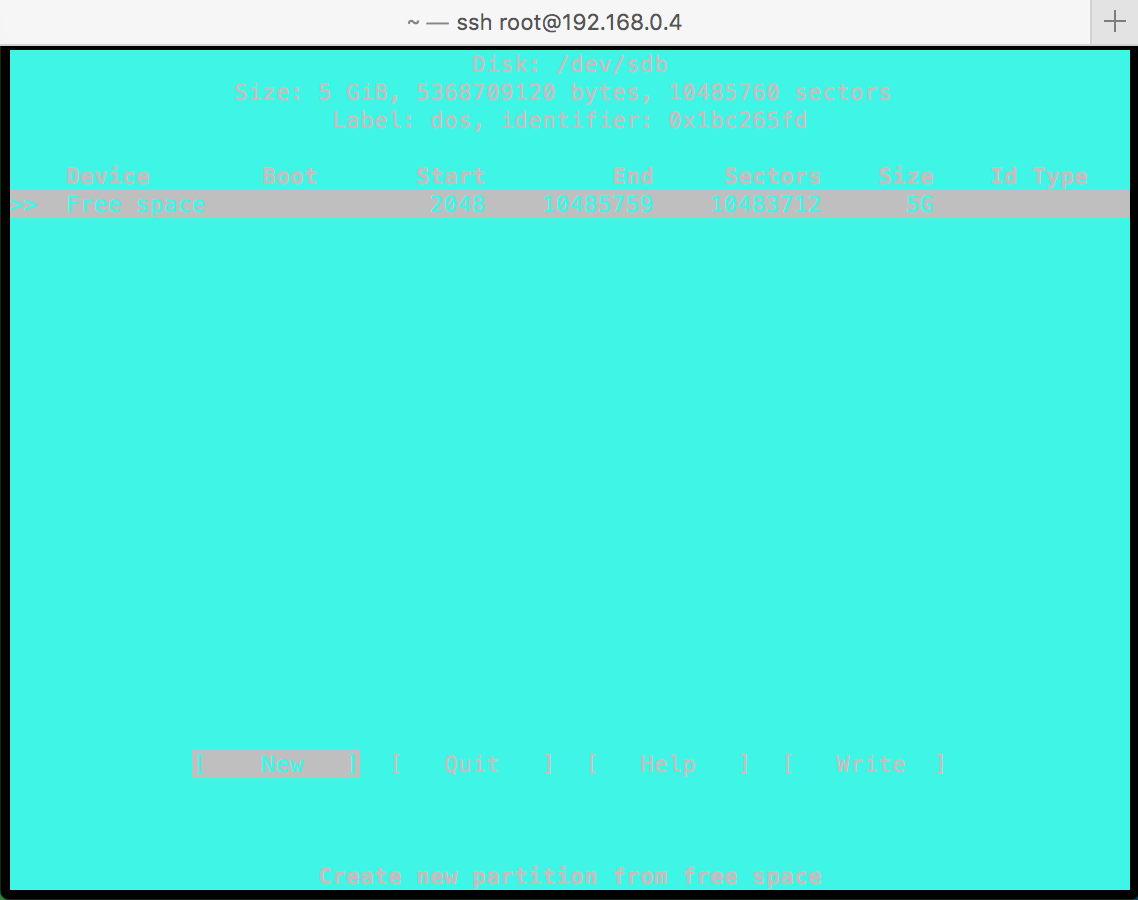 Select the New option.
Select New to create a new partition.
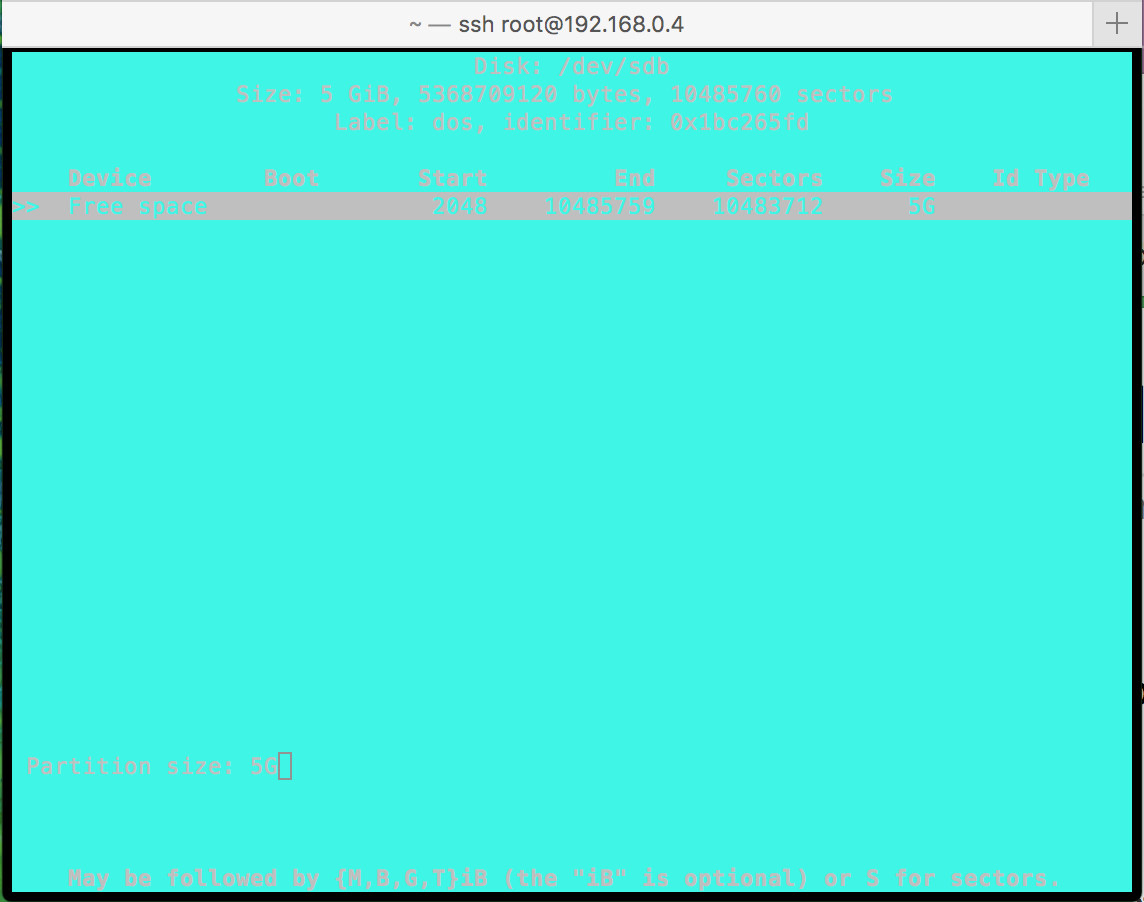 Use the full 5 GB disk capacity for the new partition.
Specify the partition size. In this example, the entire 5 GB disk is used.
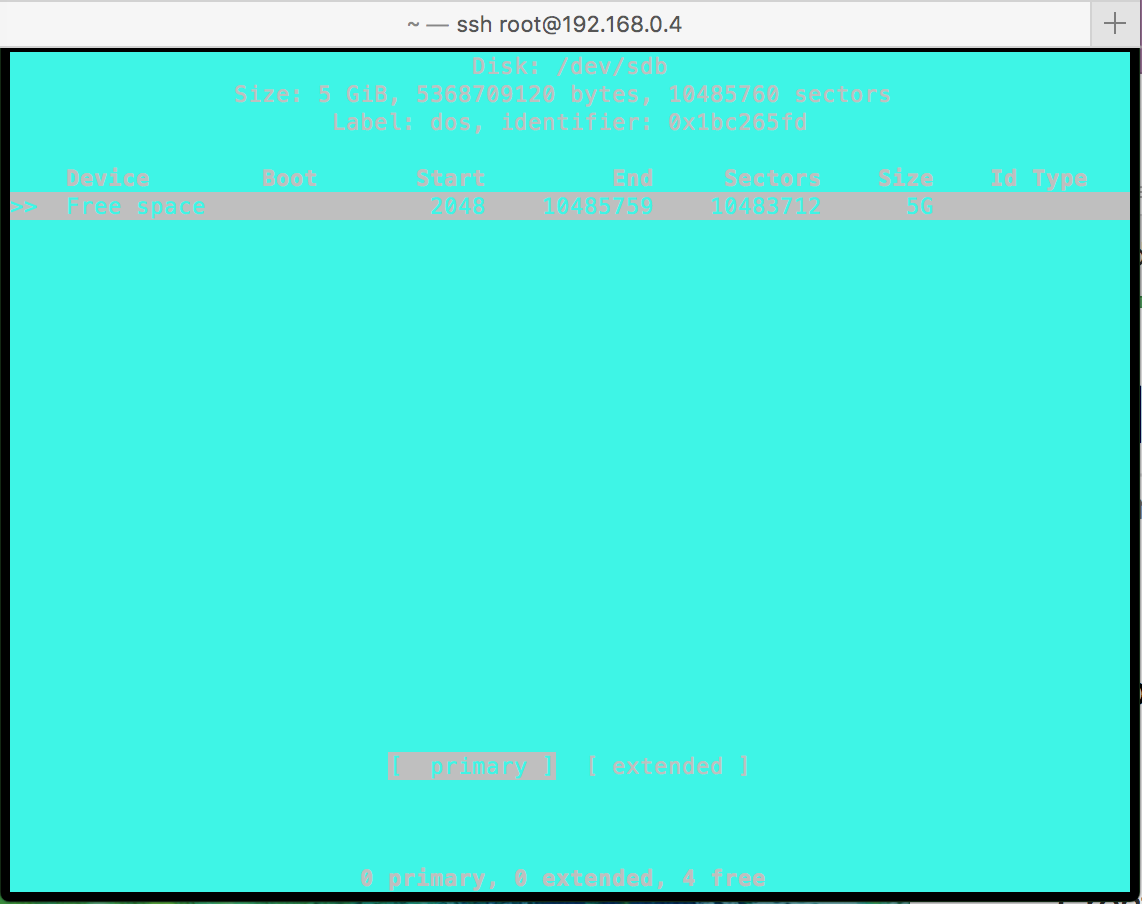 Create a primary partition.
Select:
1
primary
The new partition should now appear as:
1
/dev/sdb1
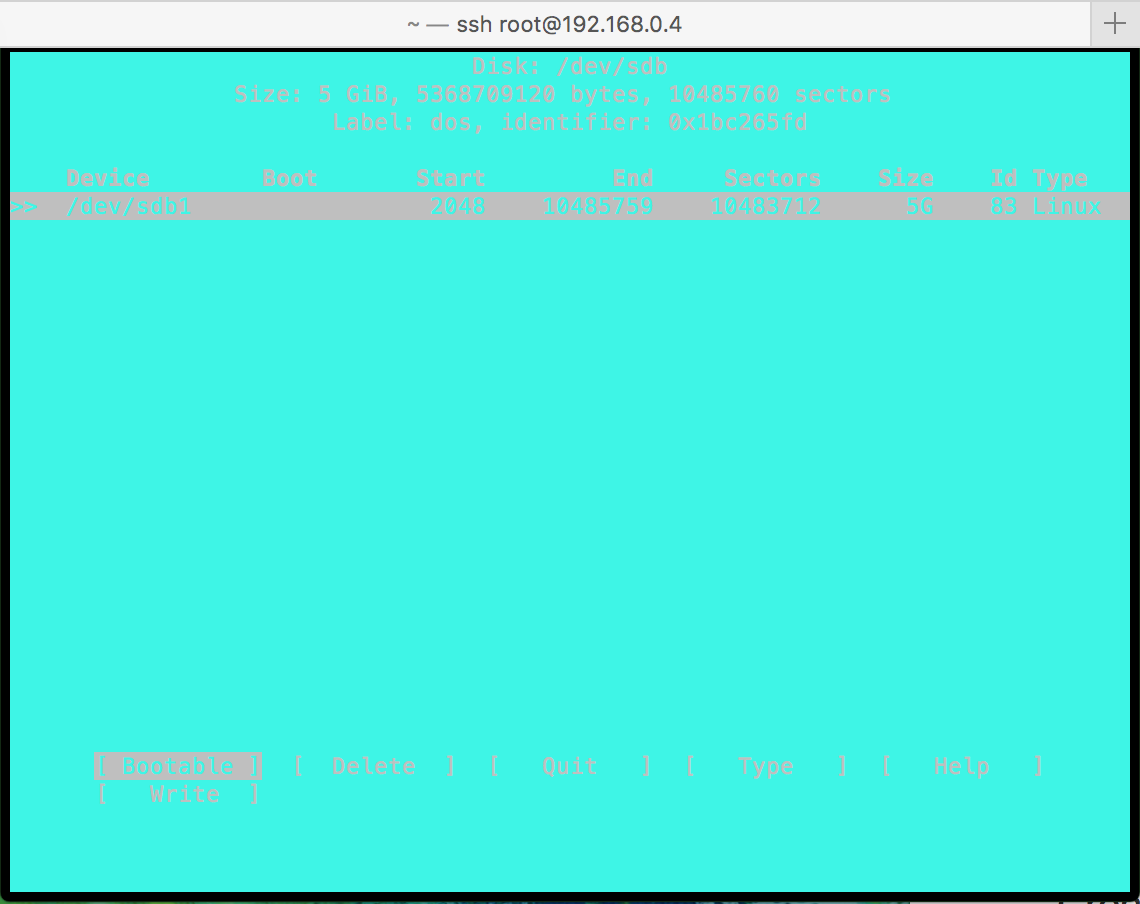 Write the partition table.
Select Write and type yes to confirm the change.
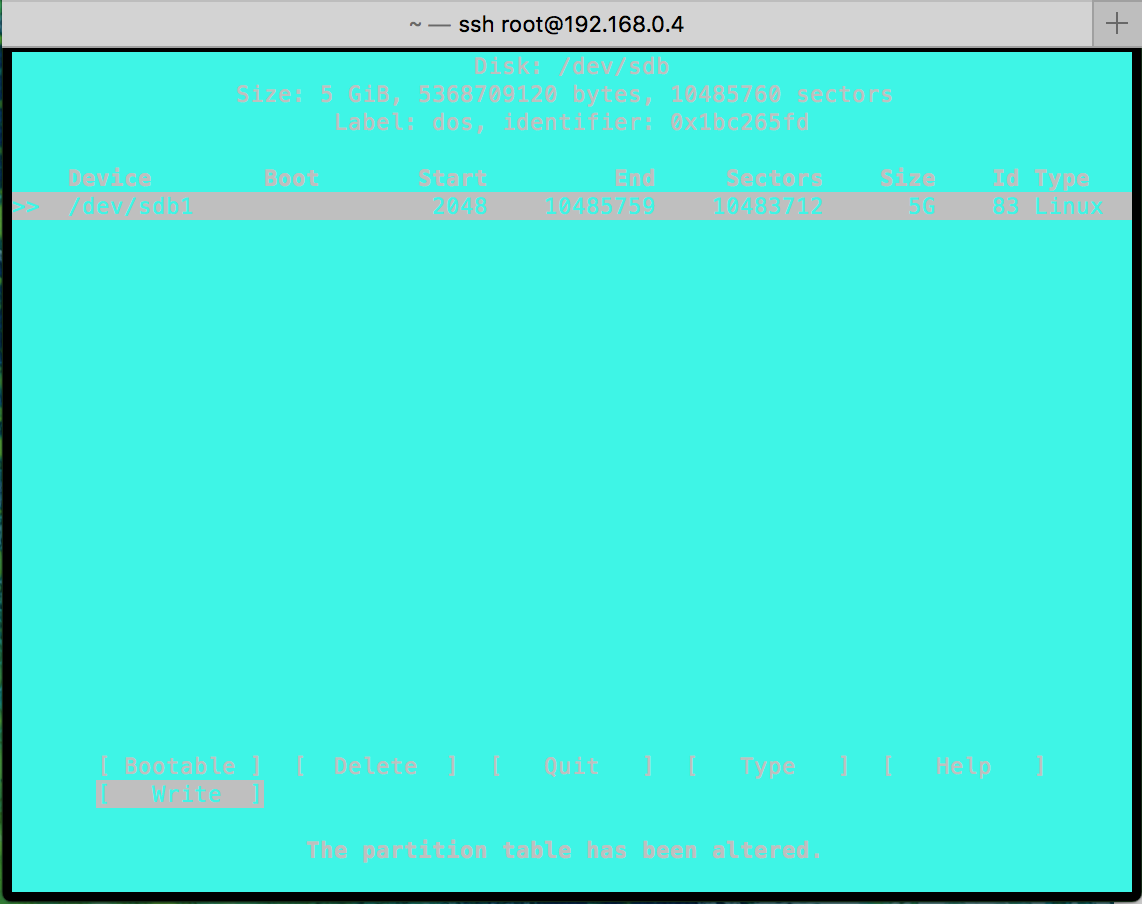 The partition has been created.
After the partition is created, select Quit to exit cfdisk.
Run the following command to verify the new partition:
1
sudo fdisk -l /dev/sdb
The output should show the new sdb1 partition, which is ready to be formatted.
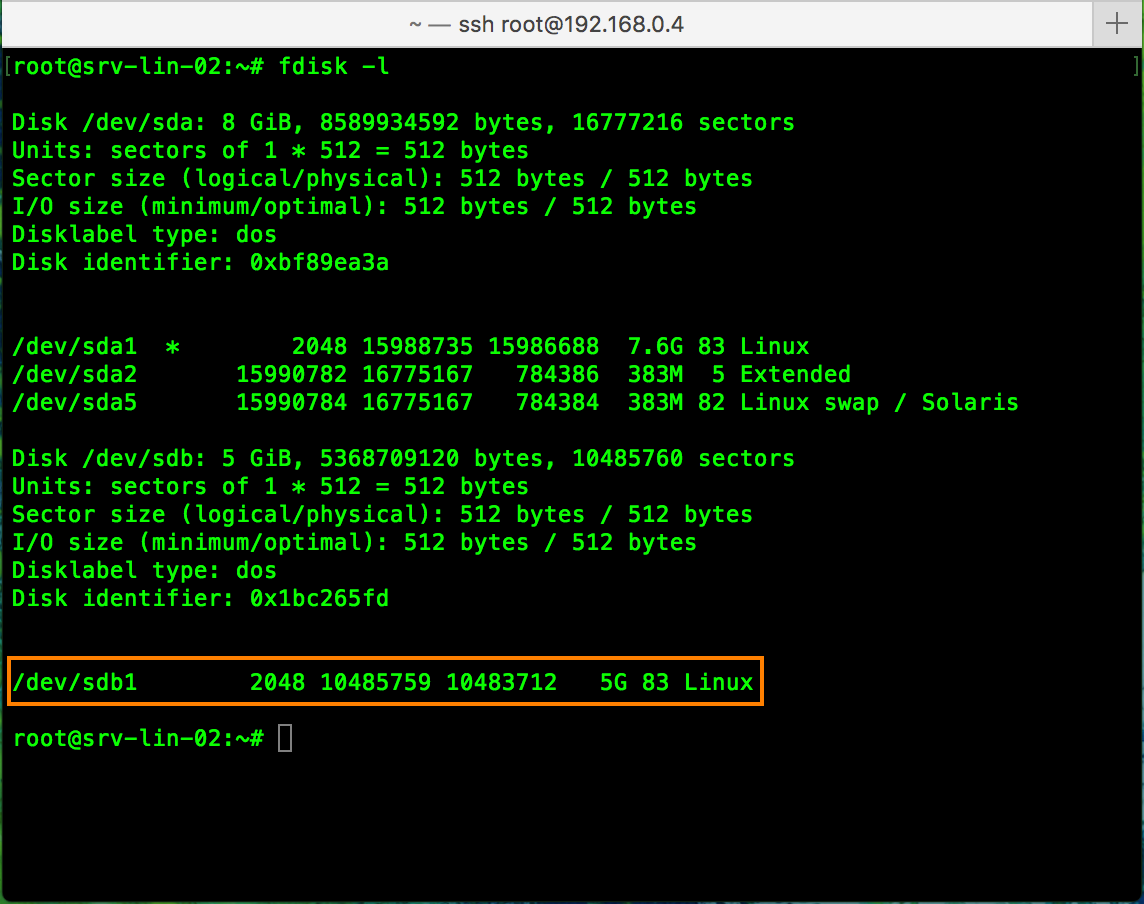 New 5 GB partition.
Format the New Partition
In this example, the new partition is formatted with the ext4 filesystem.
You can read more about the ext4 filesystem and compare Linux filesystems.
Format the new partition with:
1
sudo mkfs.ext4 /dev/sdb1
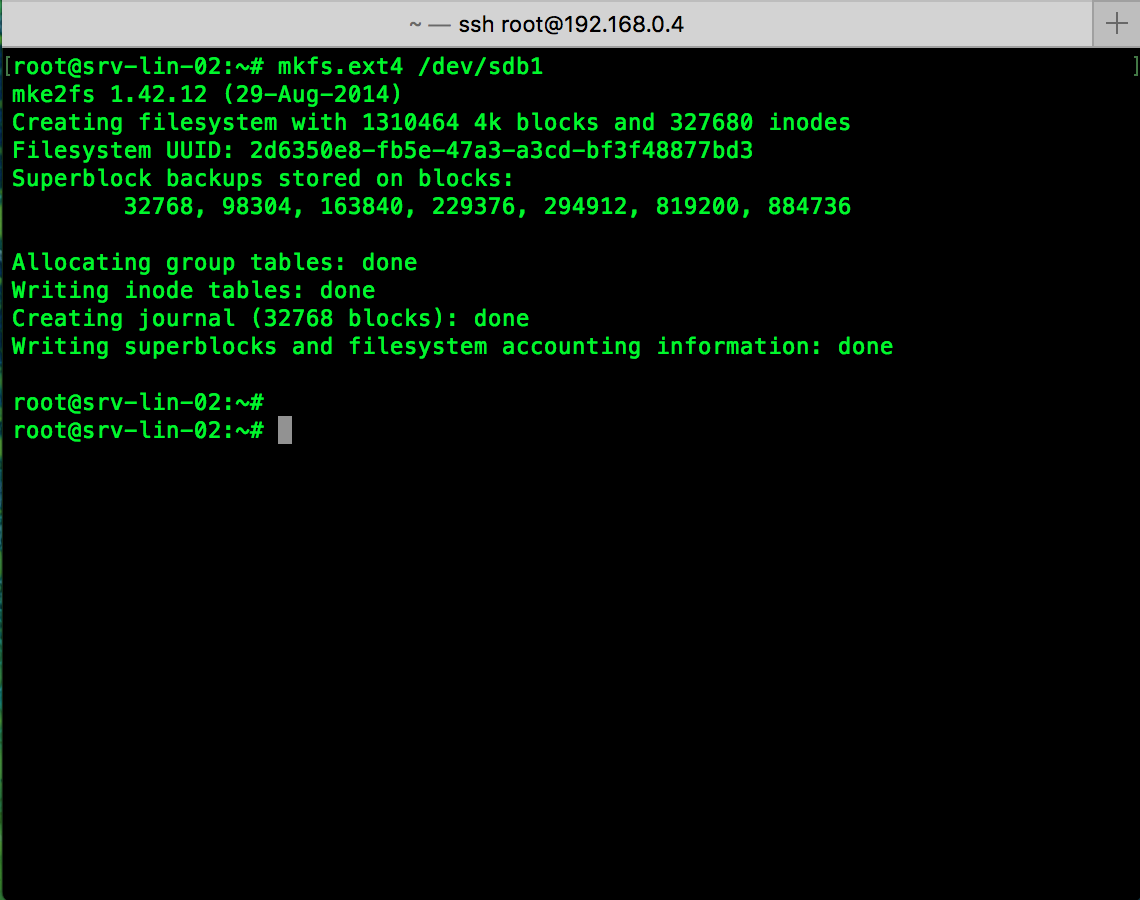 Format the new partition.
Warning: Formatting
/dev/sdb1erases data on that partition. Verify the device name before runningmkfs.ext4.
Mount the New Disk
Before you can access the new filesystem, create a mount directory and mount the partition.
You can choose a different directory name, but using a clear and consistent naming convention makes storage easier to manage.
Create the mount directory:
1
sudo mkdir /driveD
Mount the partition:
1
sudo mount -t ext4 /dev/sdb1 /driveD
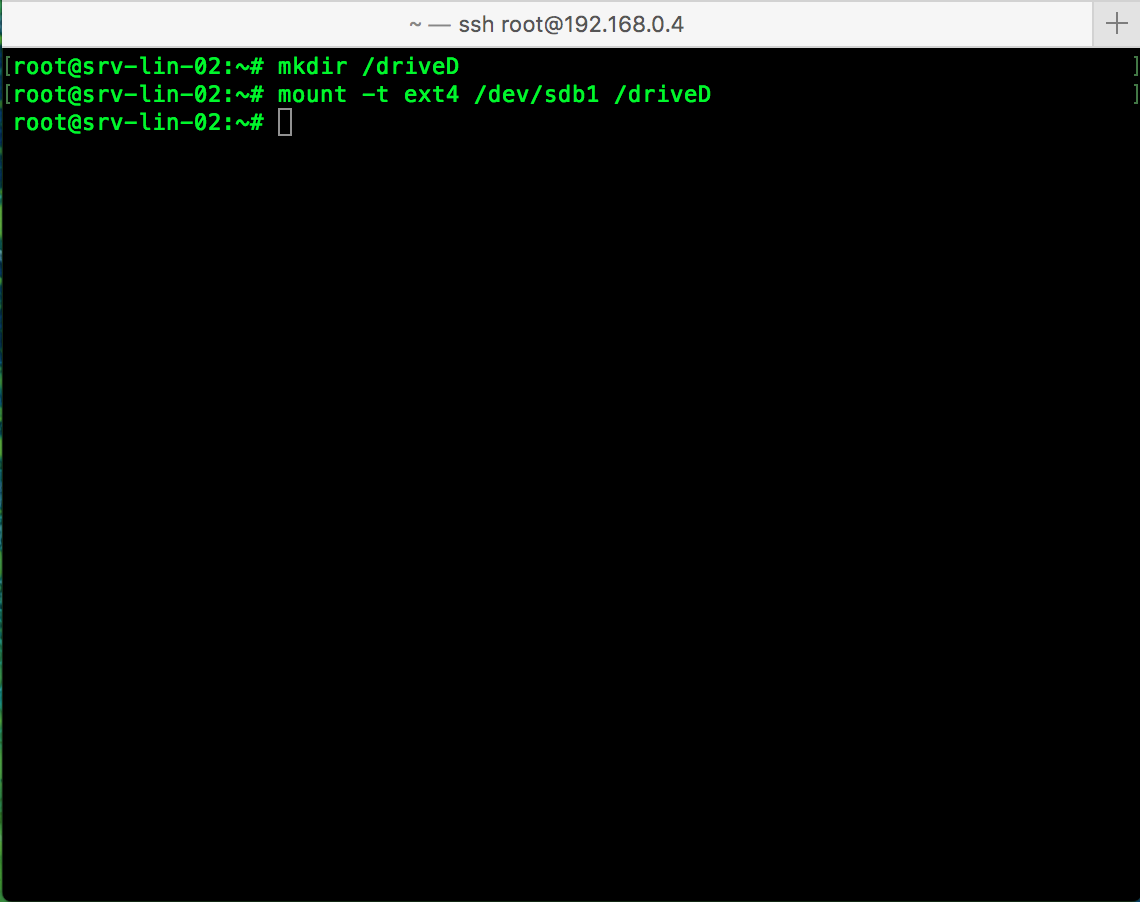 Mount the new partition.
Verify the Mounted Disk
Use df -h to display mounted filesystems:
1
df -h
Change to the new mount directory and verify that you can access it:
1
2
cd /driveD
ls
Create a test directory:
1
mkdir test
The complete command sequence is:
1
2
3
4
df -h
cd /driveD
ls
mkdir test
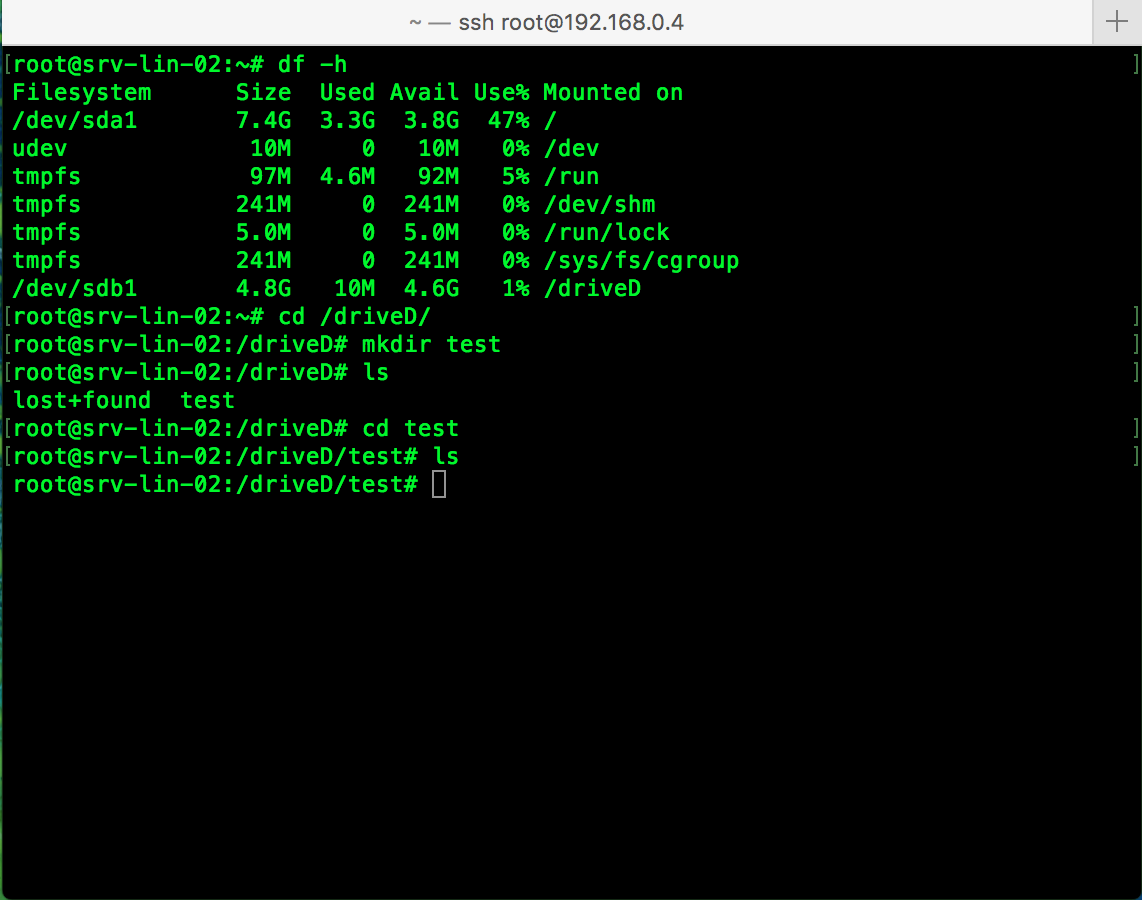 All mounted disks.
Configure Automatic Mounting
A manually mounted filesystem is not automatically mounted after a reboot. To mount the disk automatically, add an entry to /etc/fstab.
Recommendation: Use the filesystem UUID instead of
/dev/sdb1in/etc/fstab. Device names can change when disks are added or removed.
First, retrieve the UUID of the new filesystem:
1
sudo blkid /dev/sdb1
The output should look similar to this:
1
/dev/sdb1: UUID="xxxxxxxx-xxxx-xxxx-xxxx-xxxxxxxxxxxx" TYPE="ext4"
Open /etc/fstab with your preferred editor:
1
sudo nano /etc/fstab
Add an entry using the UUID:
1
UUID=xxxxxxxx-xxxx-xxxx-xxxx-xxxxxxxxxxxx /driveD ext4 defaults 0 2
Replace the example UUID with the actual UUID returned by blkid.
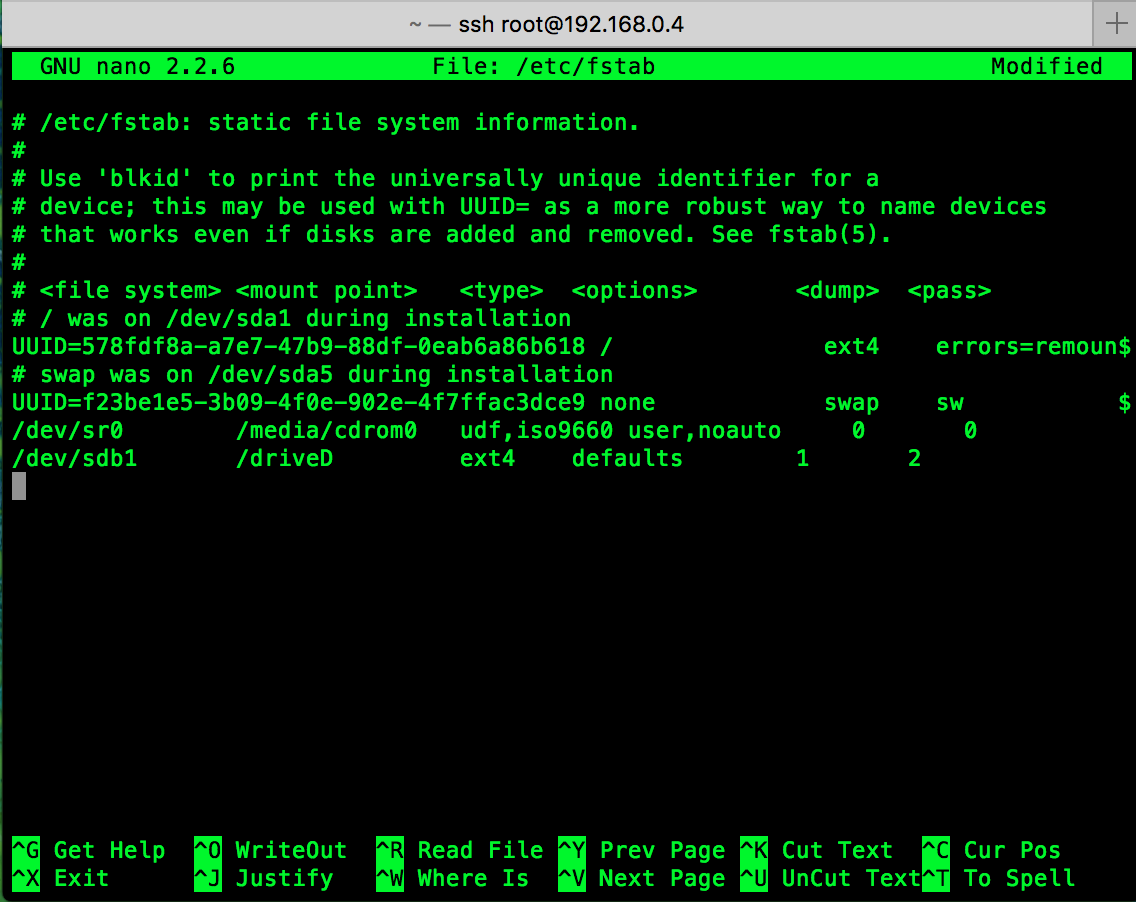 edit fstab and automise disk mount
The original device-based entry would look like this:
1
/dev/sdb1 /driveD ext4 defaults 0 2
Using the UUID is generally safer because it identifies the filesystem independently of the device name assigned by the kernel.
Save the file and test the configuration without rebooting:
1
2
sudo umount /driveD
sudo mount -a
Verify that the filesystem is mounted:
1
df -h
If mount -a completes without errors, the new disk should be mounted automatically after the server reboots.
The disk is now partitioned, formatted, mounted, and configured for automatic mounting.