How to update your VMware ESXi 6.x, Online Mode
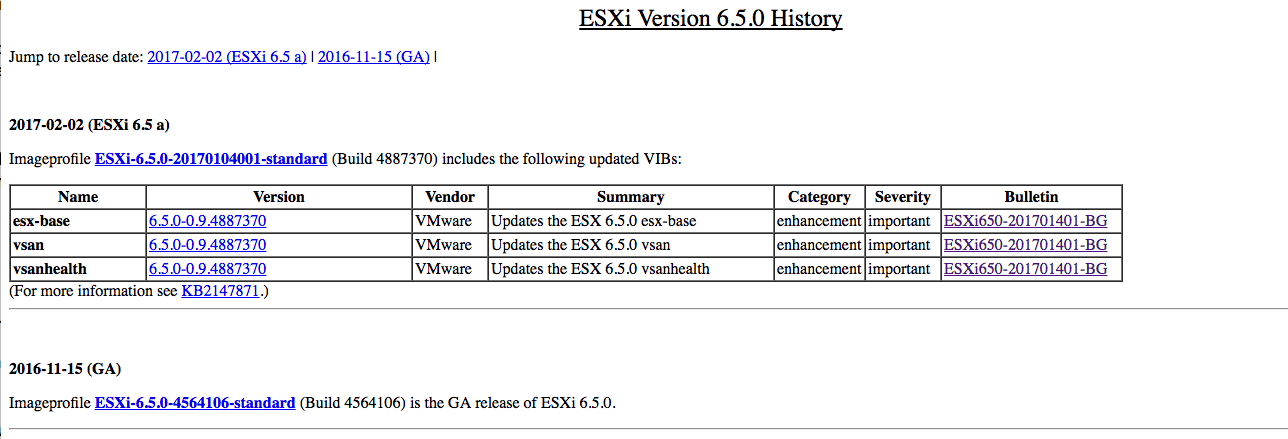
Today I would like to show you how to easily update your VMware ESXi 6.x to latest version using online repository. I am going to update my ESXi host to current latest version which is 6.5.01, you can read the VMware ESXi 6.5.0a Released Noted from here.
Also, you can see the ESXi Version 6.5.0 History to get more information about all releases in the future.
Basically, there is 2 way to update your ESXi host:
- Offline mode: which you need to download update ISO image and somehow (with iDRAC, IPMI, KVM, iLO or whatever) mount it to your ESXi host or transfer it to the datastore and use command line to update your server
- Online mode: which is more convenient and without any trouble you use one command to update your server from VMware depot, Yes only one command!
In this post, I will only talk about online mode, however, I will write another post for offline mode in the near future.
Before you start:
- Make sure you have backup from your VMs, not only purpose of this update but having a good backup is one of most important part of your infrastructure and the big challenge that you always facing with. In another post, I would like to talk about my favorited backup solution as well.
- Always good to check if your hardware is compatible with the version of ESXi. You can take a deep look at VMware Compatibility Guide to make sure your hardware is compatible or not!
- Obviously, your server has to have the internet connection.
- Make sure you have downtime; the update requires host reboot.
How to Update:
In this case for the update we going to use VMware CLI, so I will write the procedure step by step and you will find commands that you can easily copy and paste into your SSH client of choice and run them.
- Put your host into maintenance mode.
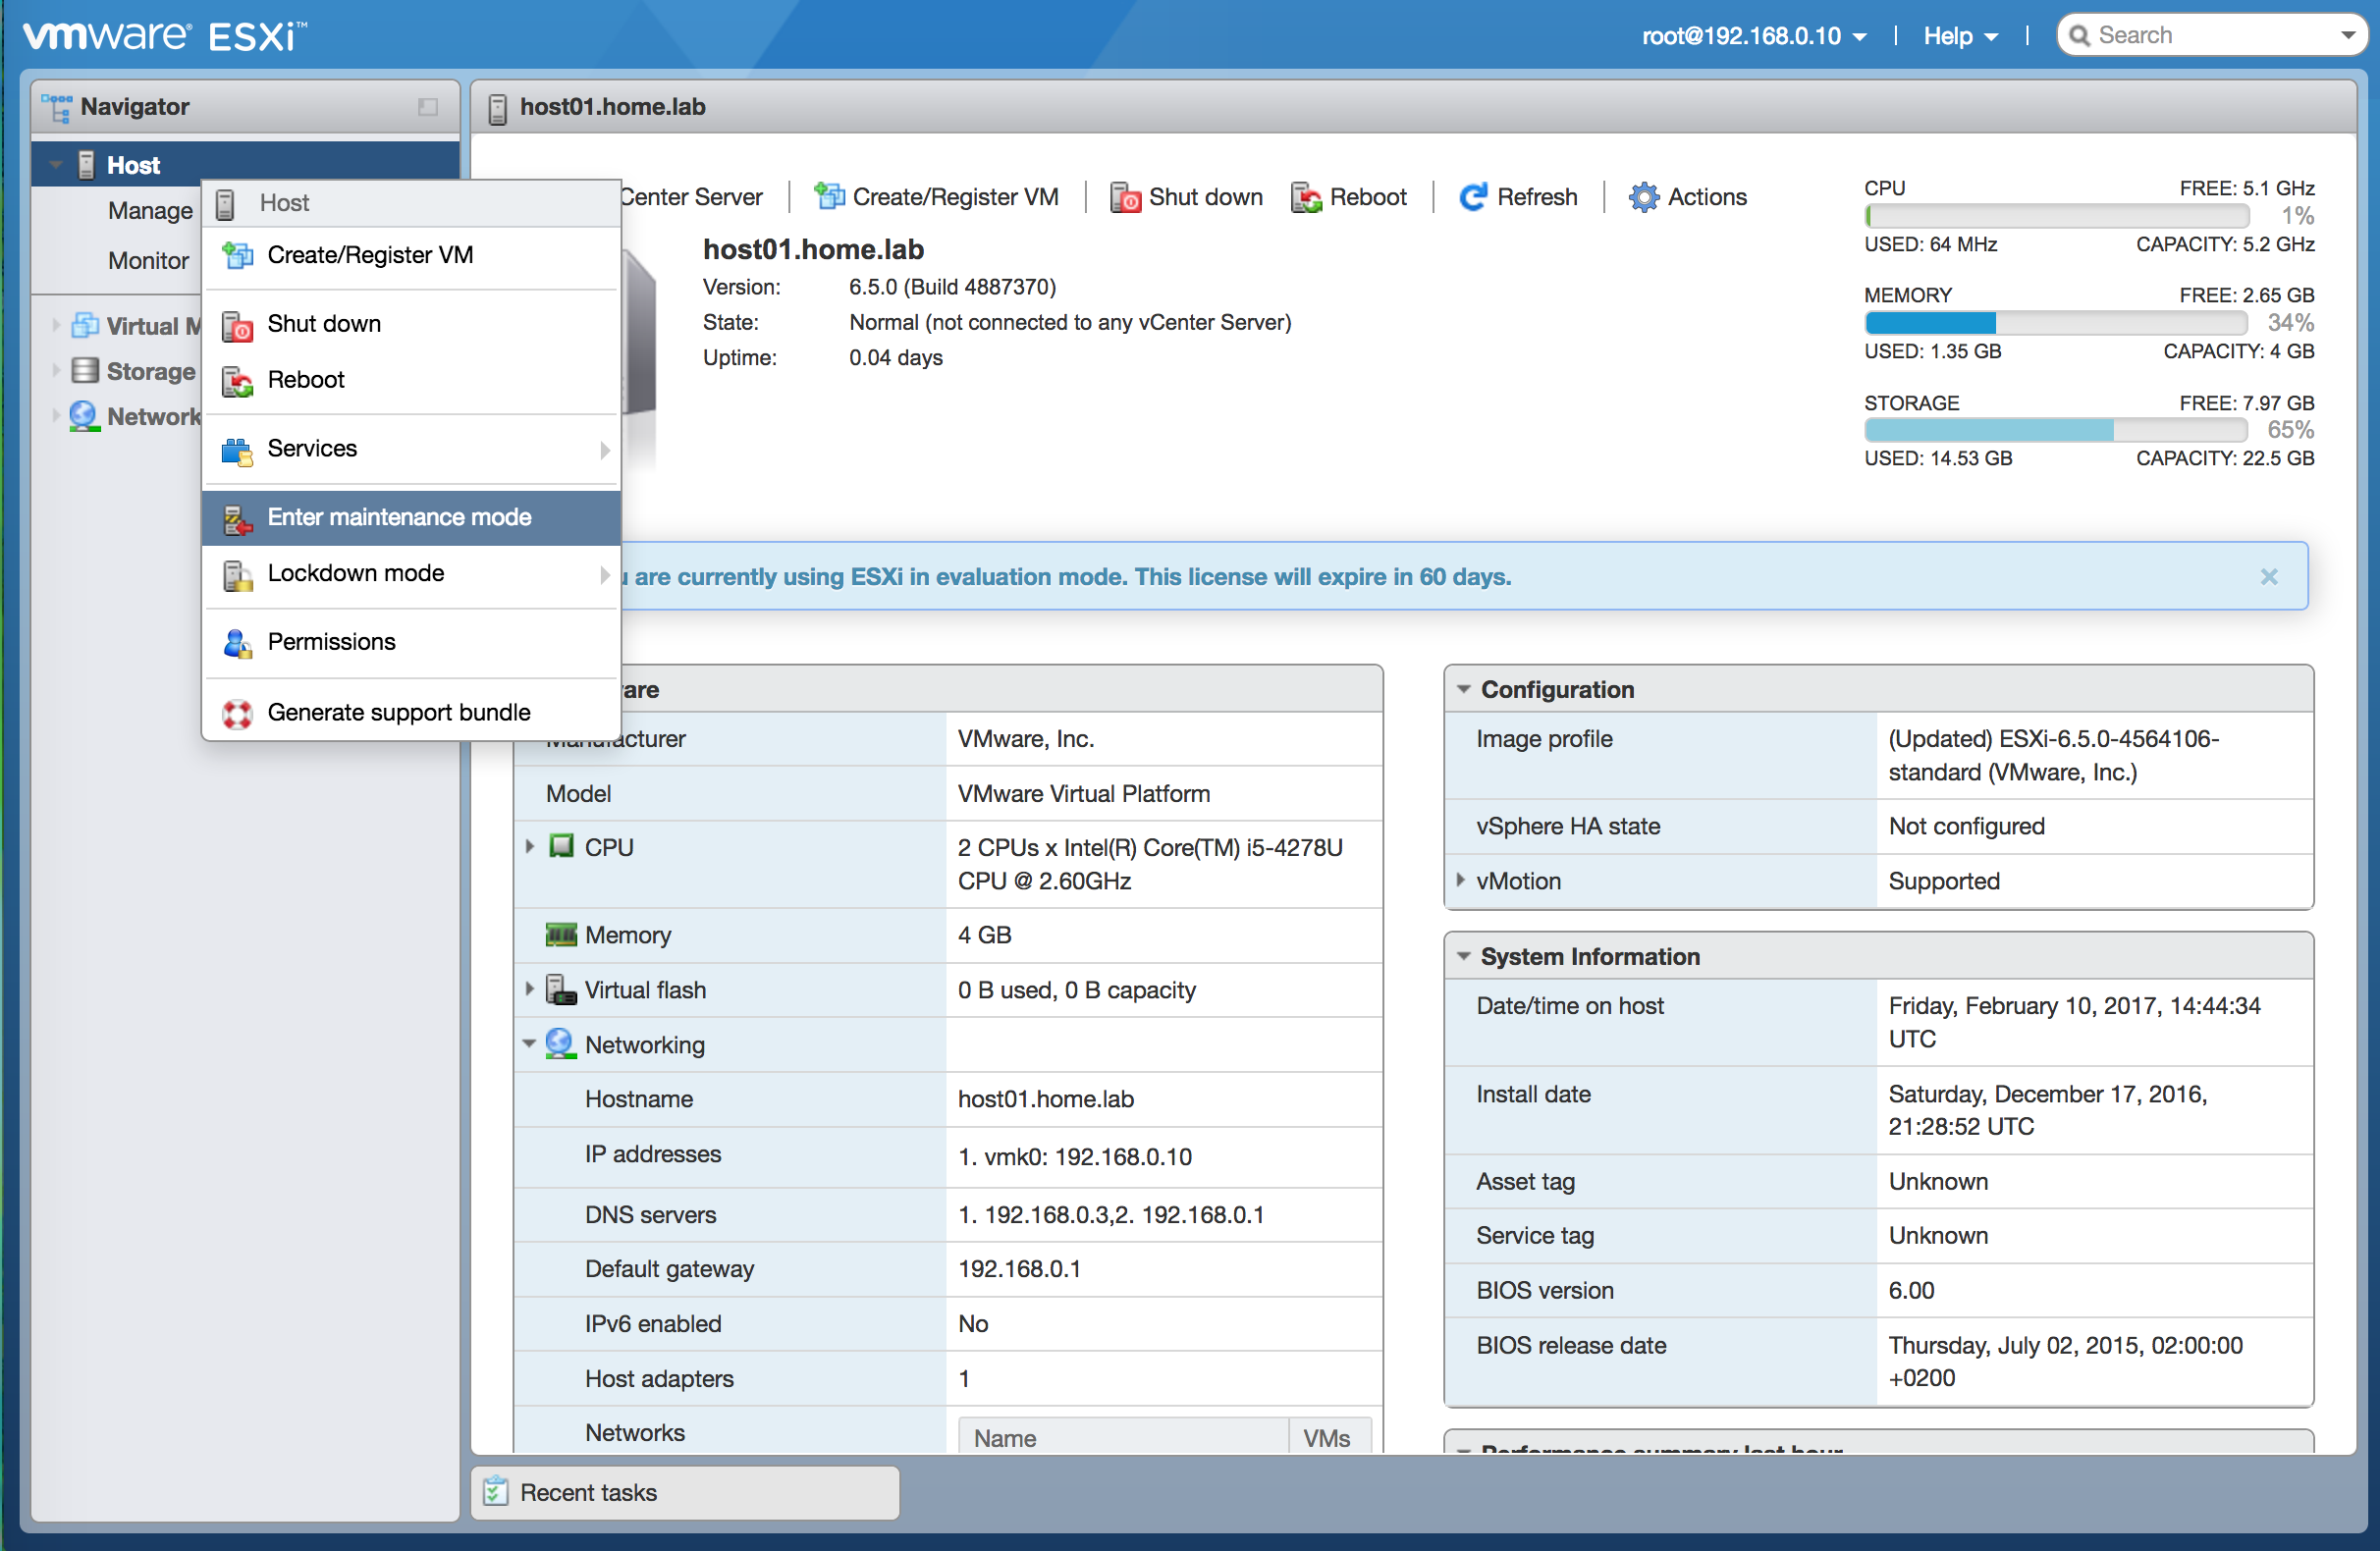
enter maintenance mode
- Open SSH session to your ESXi host server with your SSH client of choice like PuTTY. First, you need to enable SSH service in your ESXi web client. Navigate to Host > Manage > Services and start service TMS-SSH.
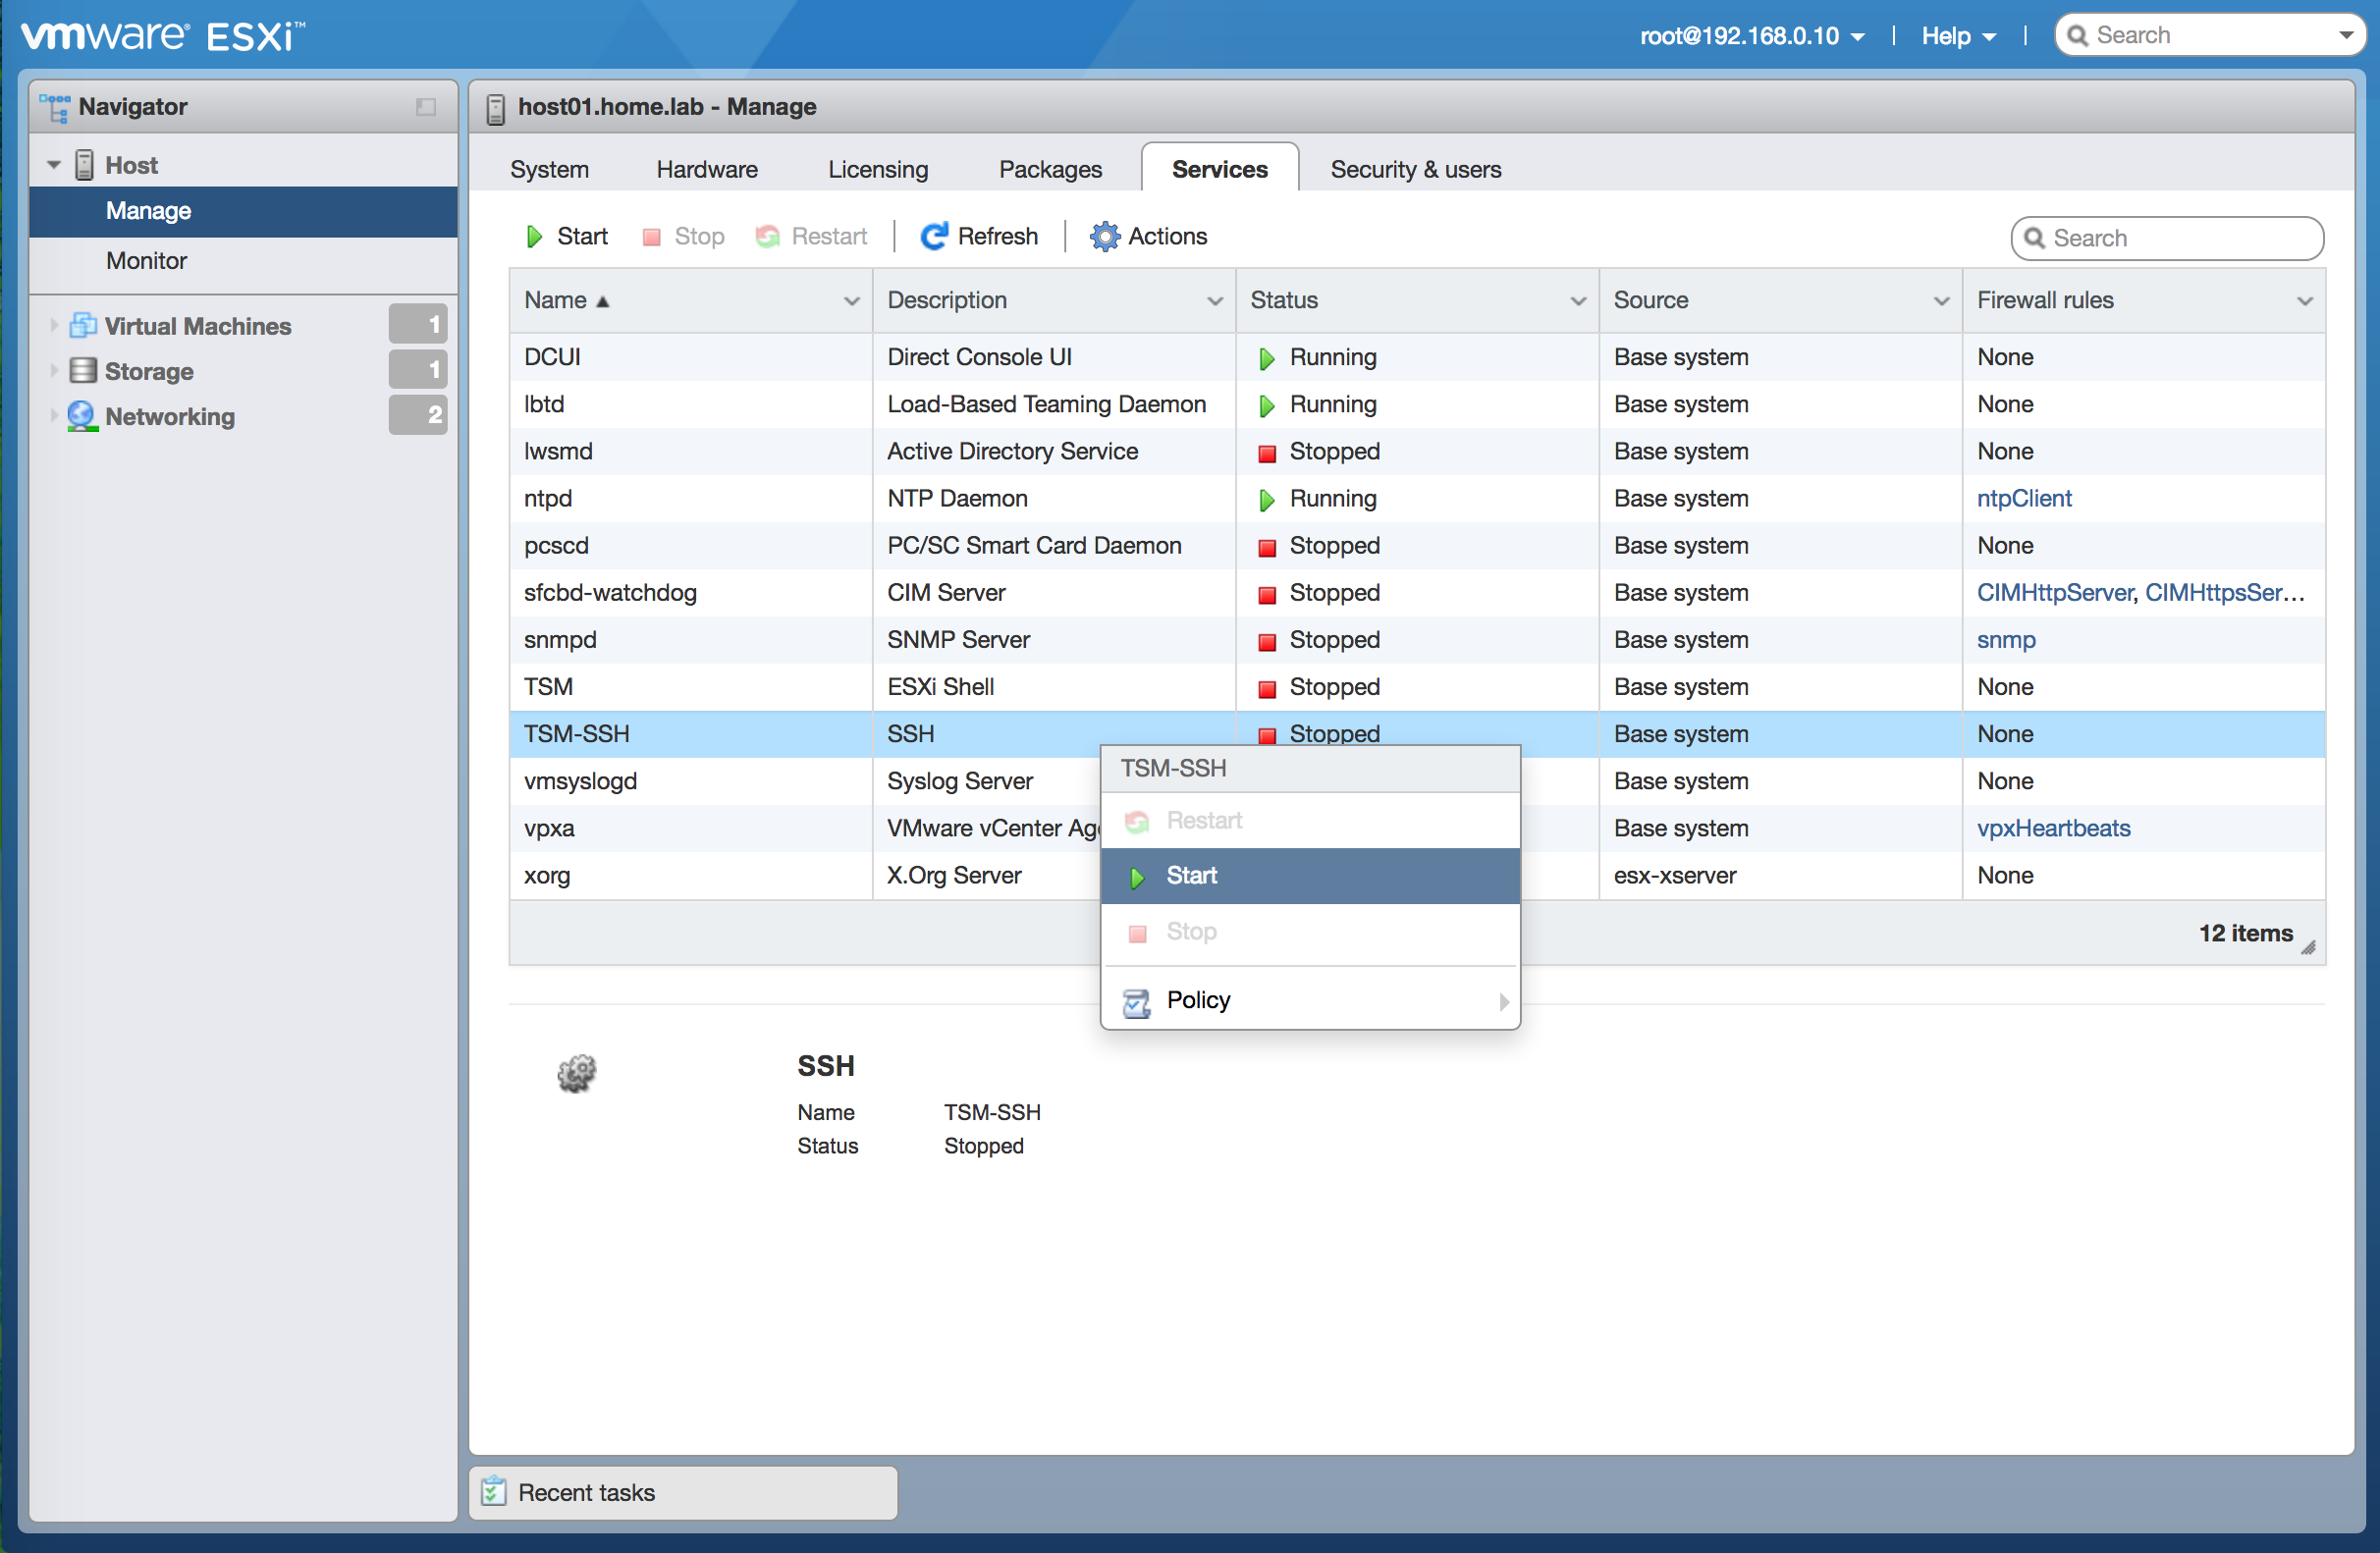
enable SSH service
- We want to see current software version and build number, so run the command bellow to Determine:
vmware -vl
- You can run the following command in order to see the list of all available ESXi profiles:
esxcli software sources profile list --depot=https://hostupdate.vmware.com/software/VUM/PRODUCTION/main/vmw-depot-index.xml
- Probably your ESXi firewall (by default) reject HTTP connection, so first, we need to enable firewall rule to allow for web traffic:
esxcli network firewall ruleset set -e true -r httpClient
- Download ESXi image and run script to update ESXi automatically with one single command, it may take several minutes to complete and you will see nothing during the update, so be calm and get a cup of coffee:
esxcli software profile update -p ESXi-6.5.0-20170104001-standard -d https://hostupdate.vmware.com/software/VUM/PRODUCTION/main/vmw-depot-index.xml
after update finished you will see the screen like this, means that you have successfully updated your ESXi host to the latest version.
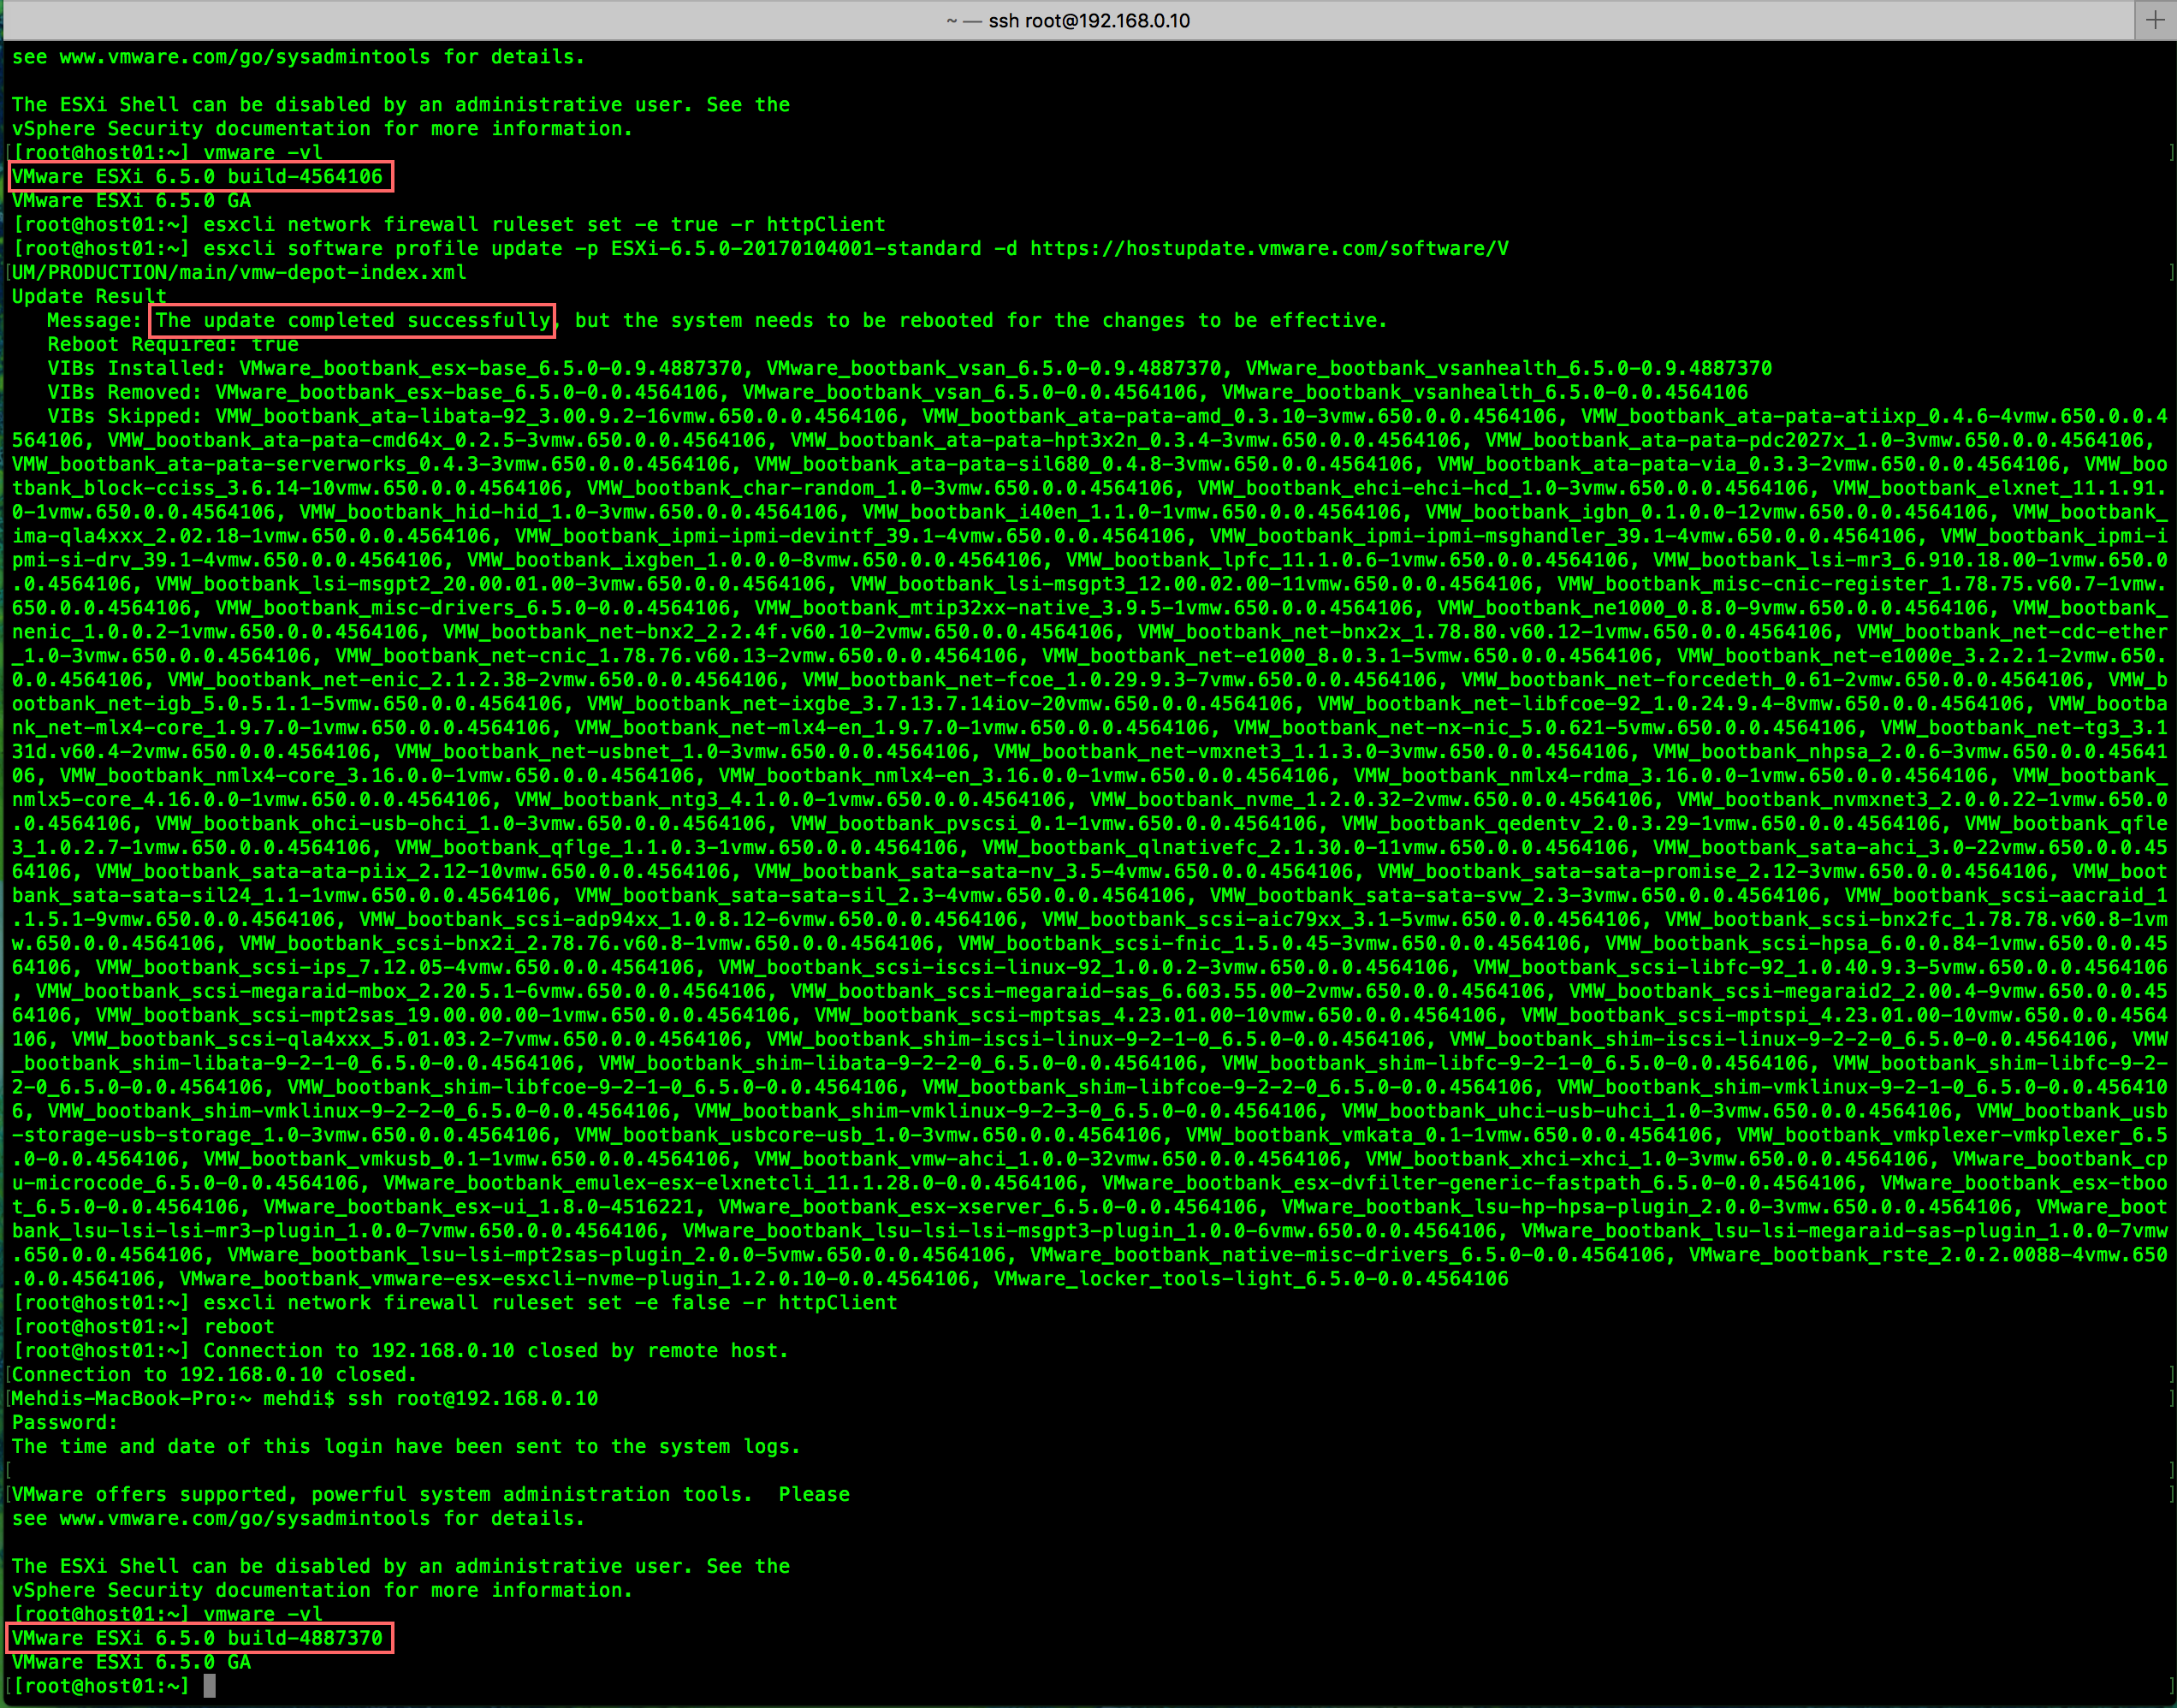
after several minutes ’patience, you will see screen like this
- Now time to disallow web traffic again as before “recommended”.
esxcli network firewall ruleset set -e false -r httpClient
- At the end, you need to exit maintenance mode and as part of required step reboot the host with the command or from the web client.
You can see the build number changed to target build number and also yo can run command vmware –vl again to see your build number.
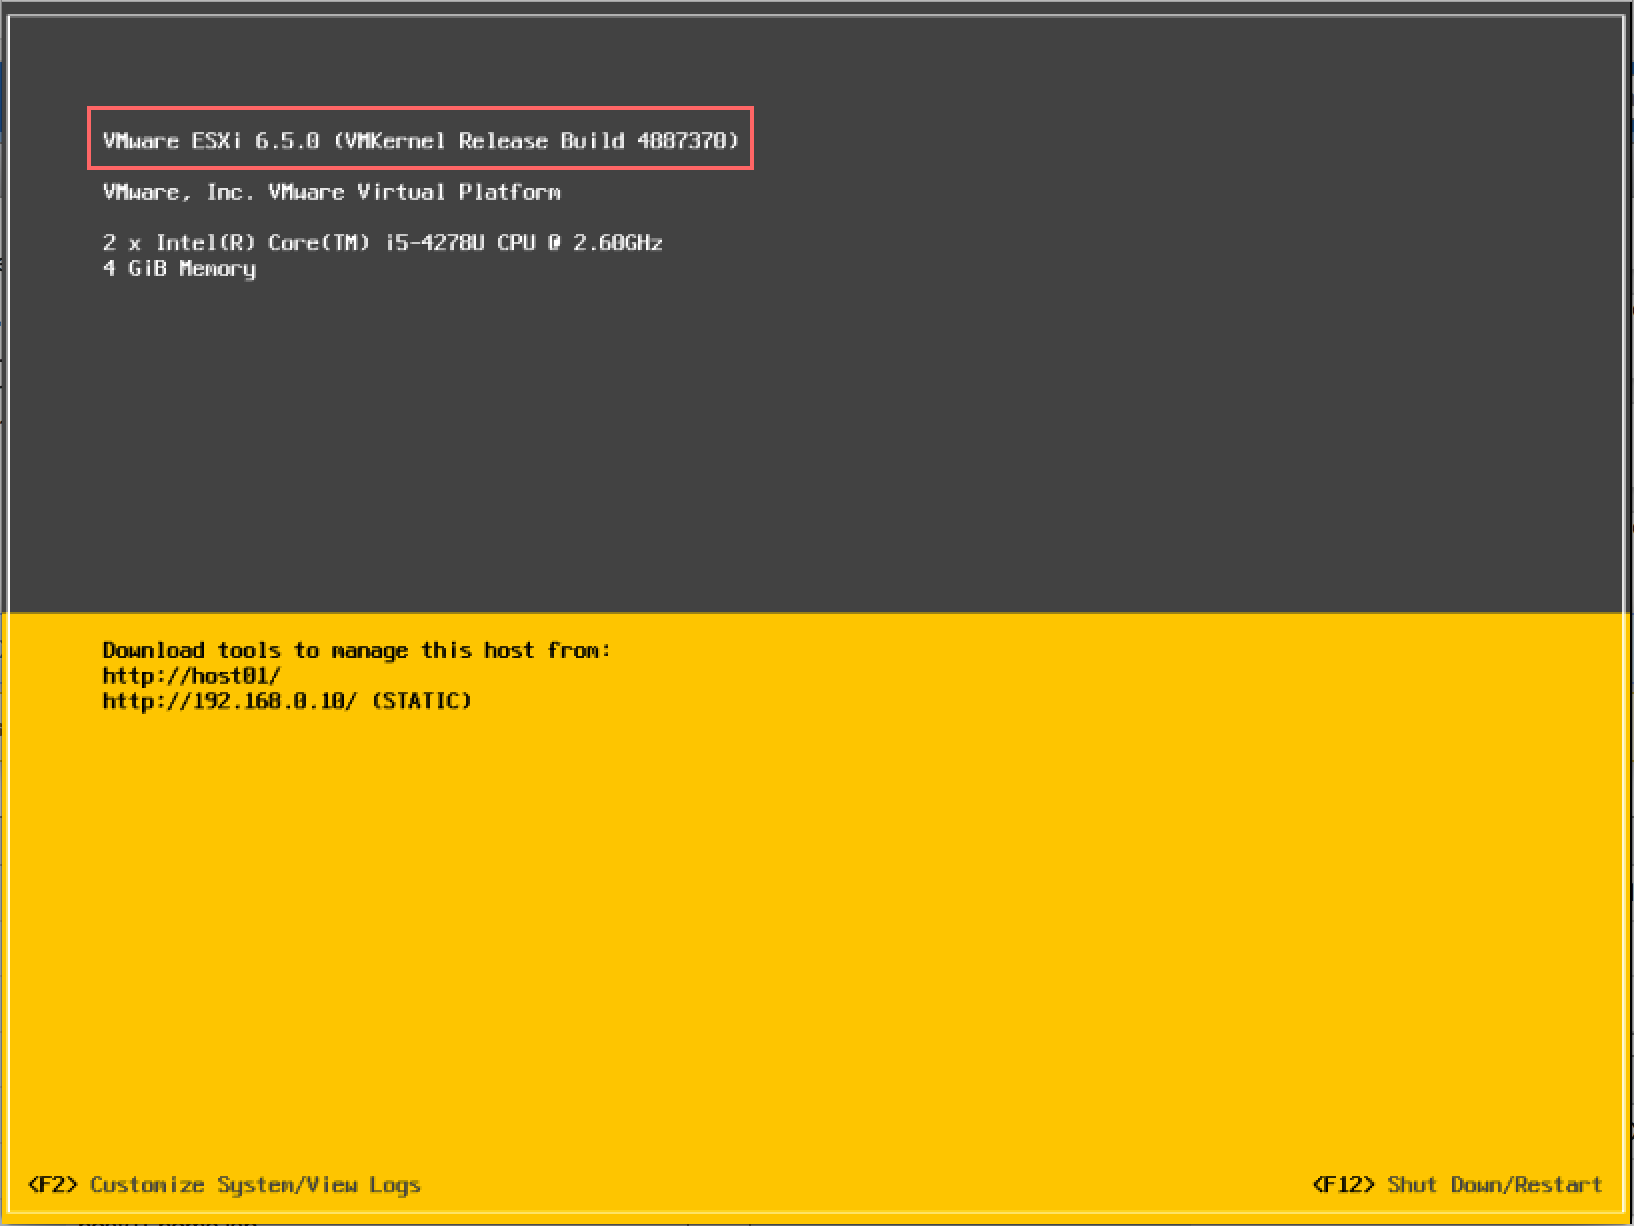
build number after successful update
Done!
Test your connectivity and make sure your all VMs running again after reboot. That was pretty easy! Right?
Let me know about your opinion and write down any question or comment.
26 Feb 2017 Update:
My post regarding update ESXi hypervisor in offline mode.