Update your VMware ESXi 8.x, 9.x - Offline Mode
In my post How to update your VMware ESXi 6.x, Offline Mode, I walked you through updating an ESXi server in offline mode using the esxcli software vib update command. However, this method has been deprecated beginning with ESXi 8.0 Update 2 and replaced by profile-based update commands, which I will demonstrate in this post. Using the offline method, you can easily and efficiently update an air-gapped standalone ESXi host. Of course, for hosts managed by vCenter, updates should be performed using vLCM to automate the process through vCenter Server.

esxcli software vib command deprecated
Today, I update my ESX 9.0.0 host (build 24813472) to ESX 9.0.1.0 (build 24957456). The same offline, profile based procedure applies to both ESXi 8.x/9.x— you just need to download the appropriate offline depot (patch) ZIP for your target image profile.
Before you start:
- Check the VMware Compatibility Guide.
- Download offline bundle ZIP from Broadcom Support Portal.
- Make sure you have downtime; the update requires a host reboot.
- My suggestion is that enter the host into maintenance mode.
How to Update:
- First step is to copy the offline bundle zip file to your host’s datastore. To do this Navigate to Storage > select datastore > datastore browser > upload and then upload the file.
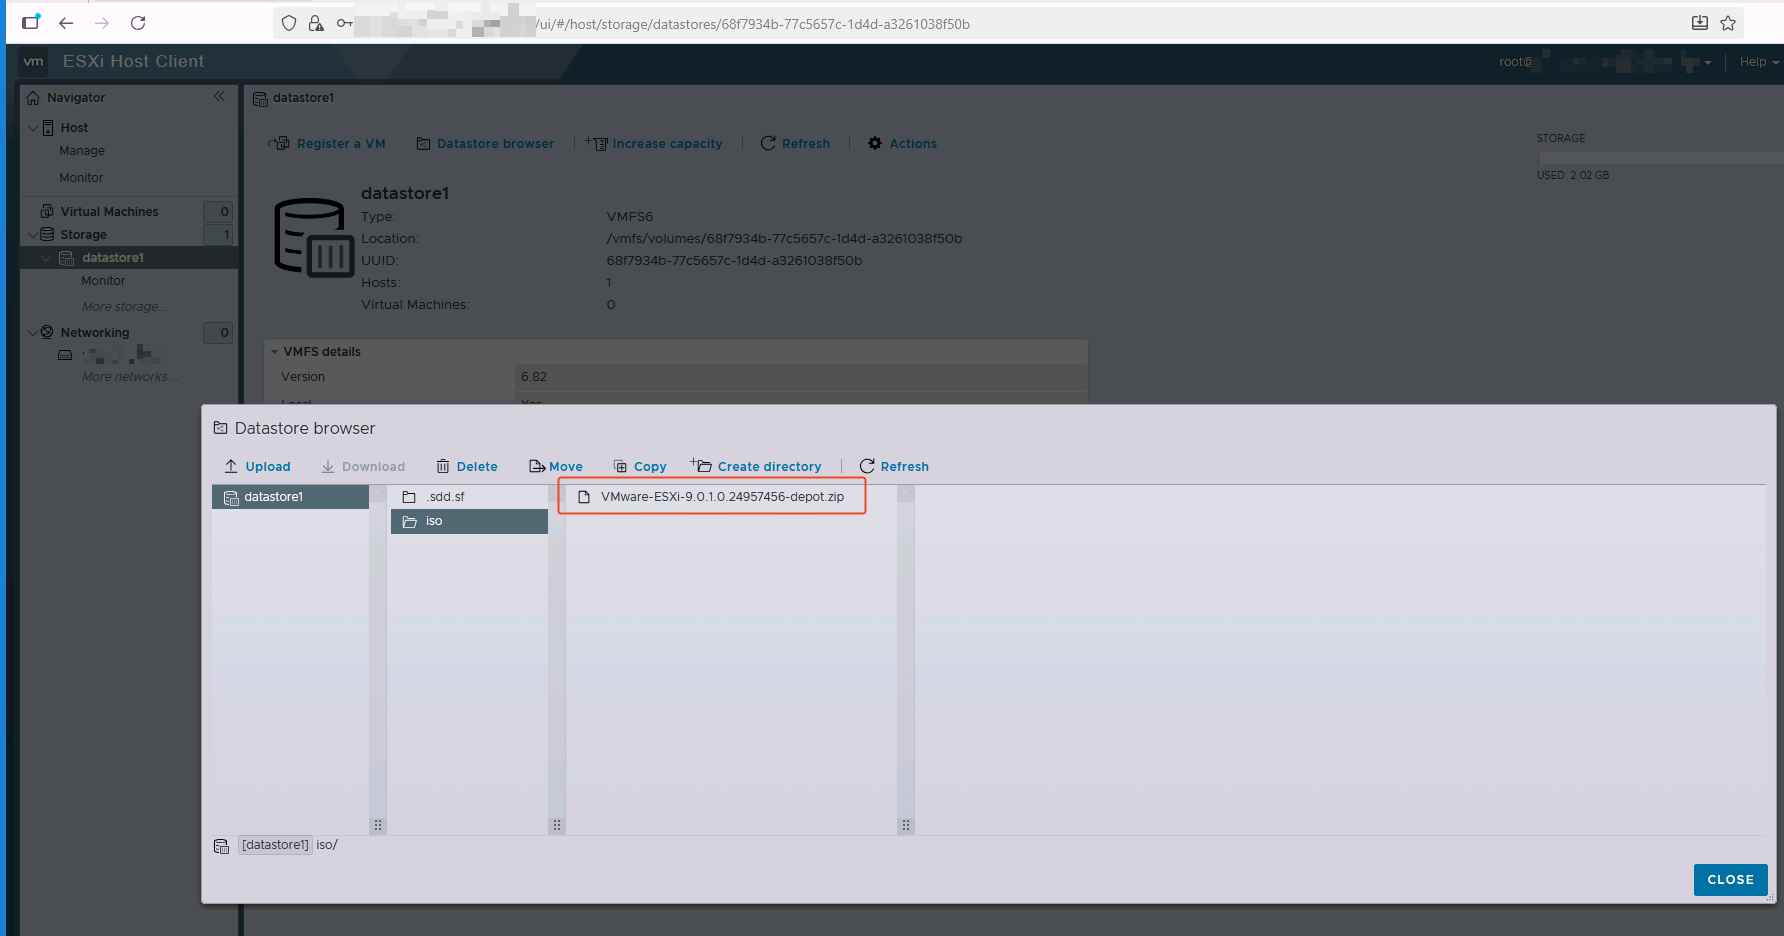
Upload zip file to datastore
-
Login to ESX host using ssh. Use your SSH client of choice like PuTTY. First, you need to enable SSH service in your ESXi web client. Navigate to Host > Manage > Services and start service TMS-SSH.
-
List image profiles available in the bundle using following command:
esxcli software sources profile list -d /vmfs/volumes/datastore/depot.zip

Available image profiles
- Use following command and the profile name from the output above to validate the changes before applying the update using dry run option:
esxcli software profile update --dry-run -d /vmfs/volumes/datastore/depot.zip -p ESXi-9.0.1-24957456-standard
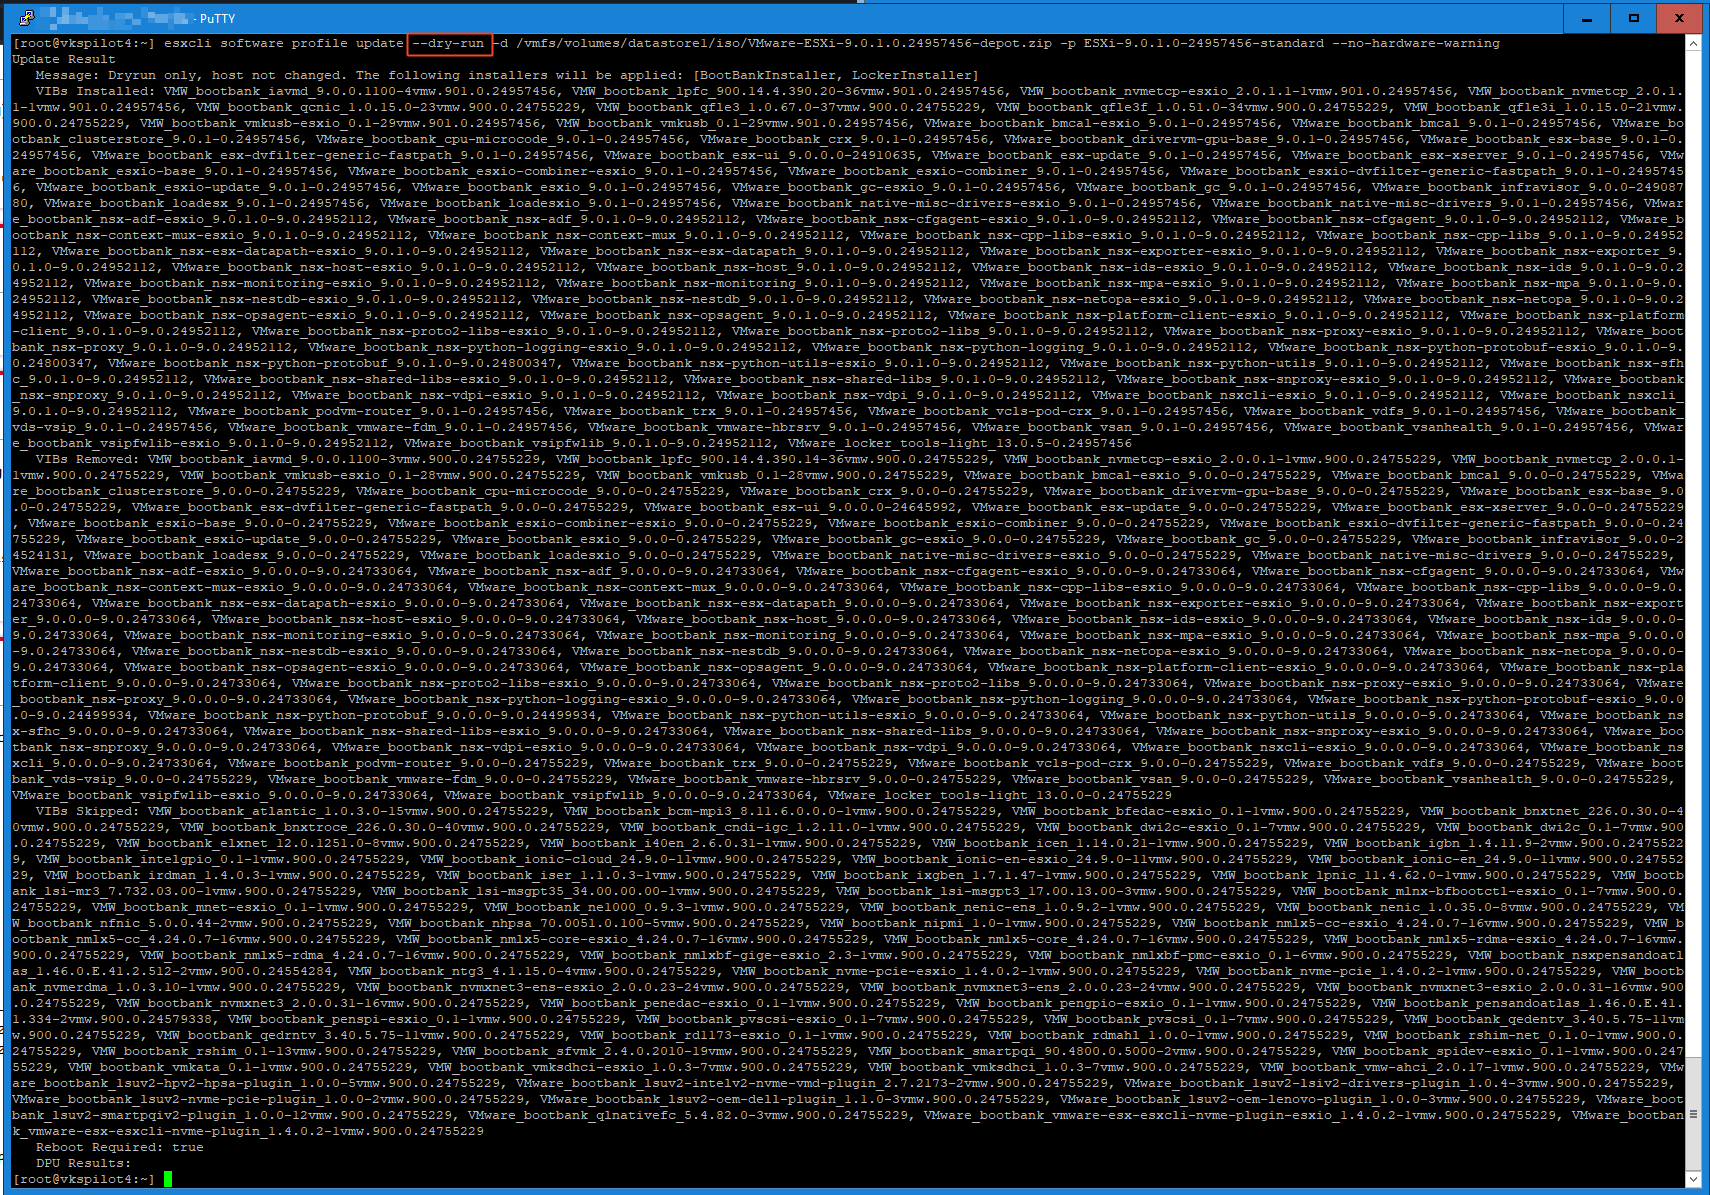
Validate with dry run
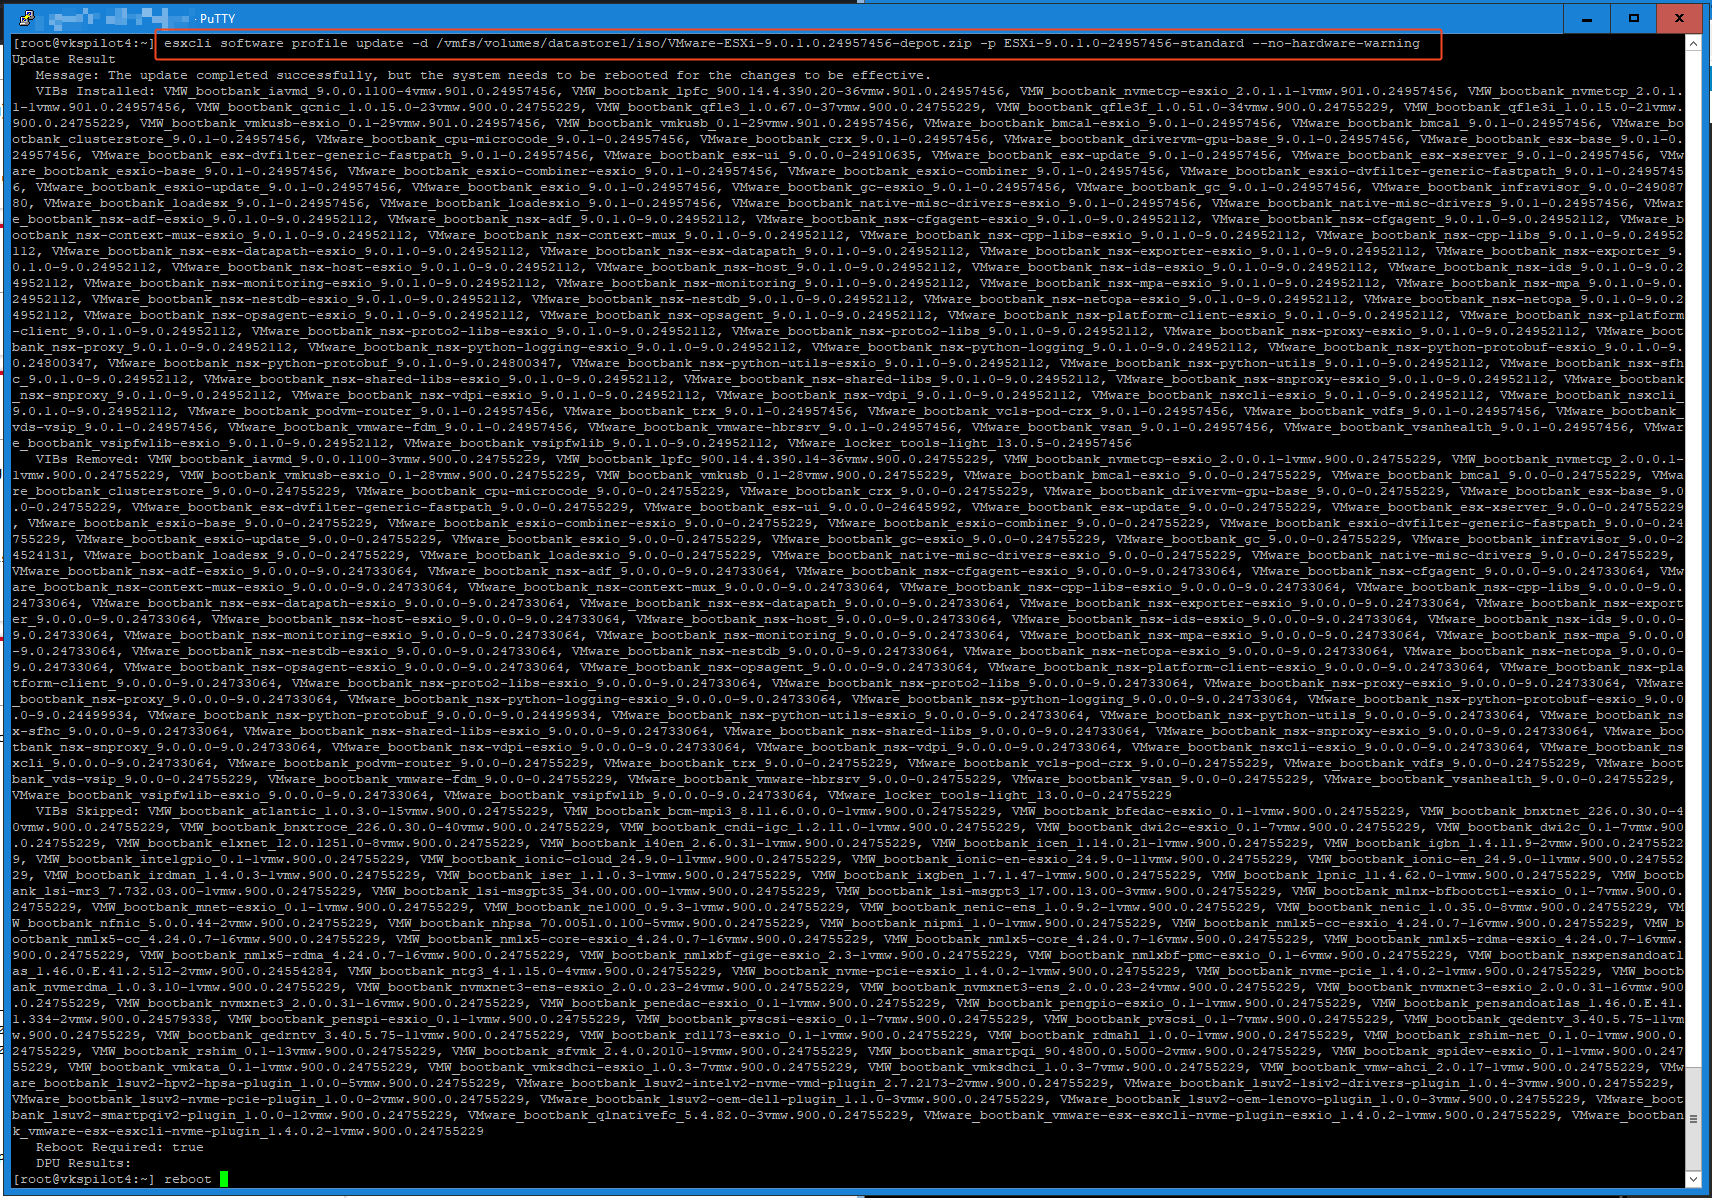
- Now after validating the changes, you can remove the dry run option to apply the update.
esxcli software profile update -d /vmfs/volumes/datastore/depot.zip -p ESXi-9.0.1-24957456-standard --no-hardware-warning
Apply update
Time to validate the installed version. Don’t forget to reboot the host after applying update.
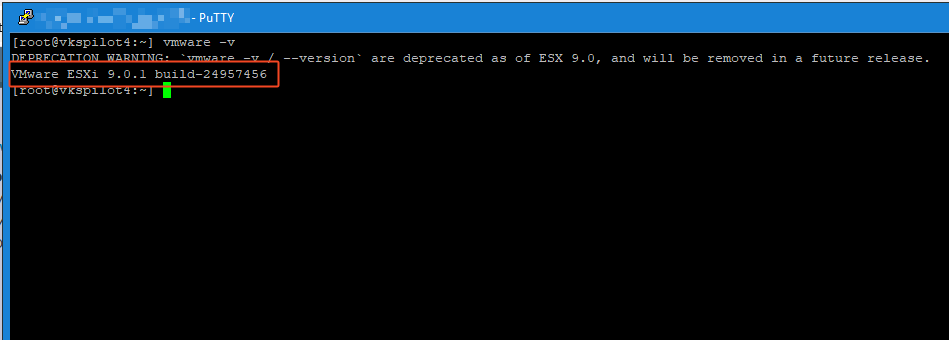
Success! We have successfully updated the ESX host.
Note: I added the –-no-hardware-warning option to the end of my command because this is a lab environment, and the CPU isn’t compatible; removing this option would result in a compatibility error. This should be used only in lab environments—production systems must run on compatible hardware.