VMware Cloud Foundation on my Lab
I am writing this article because I had trouble understanding the best way to deploy VMware Cloud Foundation (VCF) in a lab environment, given our limited resources and the high demands of VCF. For example, using the VCF Holodeck Toolkit requires 384 GB of RAM, which is beyond our current capacity. To address this issue, I searched for ways to reduce the resource requirements. I found that consolidating the NSX Manager from three instances to one and reducing the management workload cluster from a minimum of four hosts to just one can significantly lower the needed resources.
Disclaimer: This is not supported by VMware and should not be used in a production environment, use at your own risk.
What is VCF – VMware Cloud Foundation
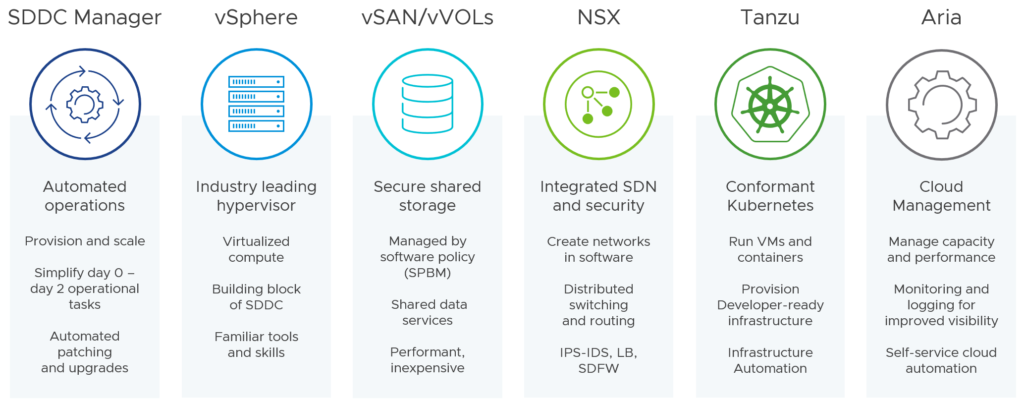
VMware Cloud Foundation is the next-generation VMware hybrid cloud platform. It evolves the VMware market-leading server virtualization, VMware vSphere®, by extending the core hypervisor with integrated software-defined storage, networking, and security capabilities that can be consumed flexibly on-premises or as a service in the public cloud. VMware Cloud Foundation provides a ubiquitous hybrid cloud platform for both traditional enterprise and modern applications. Based on a proven and comprehensive software-defined stack including VMware vSphere®, VMware VMware vSAN®, VMware NSX®, VMware vSphere® with VMware Tanzu™, and VMware Aria Suite™, VMware Cloud Foundation provides a complete set of software-defined services for compute, storage, network, container and cloud management.
VMware Cloud Foundation 5.1.1 Bill of Materials (BOM)
| Software Component | Version | Date | Build Number |
|---|---|---|---|
| Cloud Builder VM | 5.1.1 | 26 MAR 2024 | 23480823 |
| SDDC Manager | 5.1.1 | 26 MAR 2024 | 23480823 |
| VMware vCenter Server Appliance | 8.0 Update 2b | 29 FEB 2024 | 23319993 |
| VMware ESXi | 8.0 Update 2b | 29 FEB 2024 | 23305546 |
| VMware vSAN Witness Appliance | 8.0 Update 2 | 21 SEP 2023 | 22443122 |
| VMware NSX | 4.1.2.3 | 12 MAR 2024 | 23382408 |
| VMware Aria Suite Lifecycle | 8.16 | 29 FEB 2024 | 23377566 |
Prepping the environment for VCF
- Nested ESXi Host
- 24 vCPUs – Intel(R) Xeon(R) Gold 5412U. don’t forget to enable Expose hardware-assisted virtualization to the guest OS
- 128 GB RAM
- IP, DNS, NTP, and Certificate have been set and configured
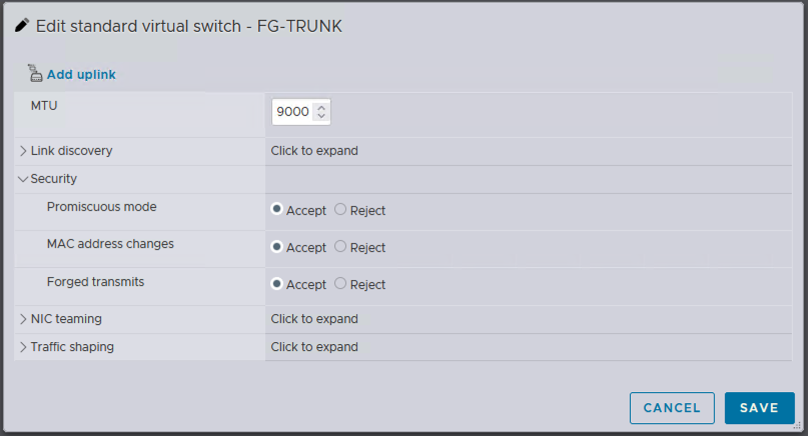
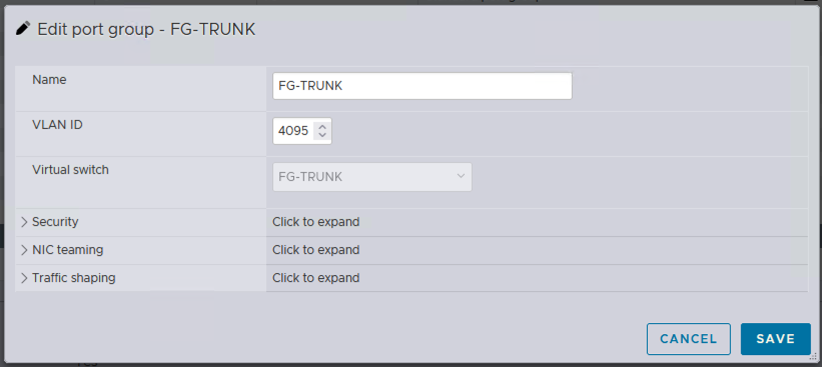
- 2x vNIC -Trunked vSwitch and MTU 9000- for:
- Management (1500 Byte MTU)
- vMotion (9000 Byte MTU)
- vSAN (9000 Byte MTU)*
- NSX-T (Tunnel Endpoint or TEP) (9000 Byte MTU)
vm settings trunk virtual switch trunk virtual switch
IP Addresses
| Subnet | VLAN | Purpose |
|---|---|---|
| 192.168.59.0/24 | 59 | vMotion |
| 192.168.60.0/24 | 60 | vSAN |
| 192.168.110.0/24 | 110 | Management |
| 192.168.111.0/24 | 111 | NSX TEP |
DNS Records
| IP Address | DNS Name | Purpose |
|---|---|---|
| 192.168.110.6 | cb.mkv.lab | Cloud Builder |
| 192.168.110.7 | vcf-01.mkv.lab | SDDC Manager |
| 192.168.110.8 | vc-01.mkv.lab | vCenter Server |
| 192.168.110.9 | nsx-01.mkv.lab | NSX Manager |
| 192.168.110.11 | esxi-01.mkv.lab | Nested ESXi Host |
You need to make sure that all DNS Zones (Forwarding and Reverse Lookup Zone) and all the records have been created correctly.
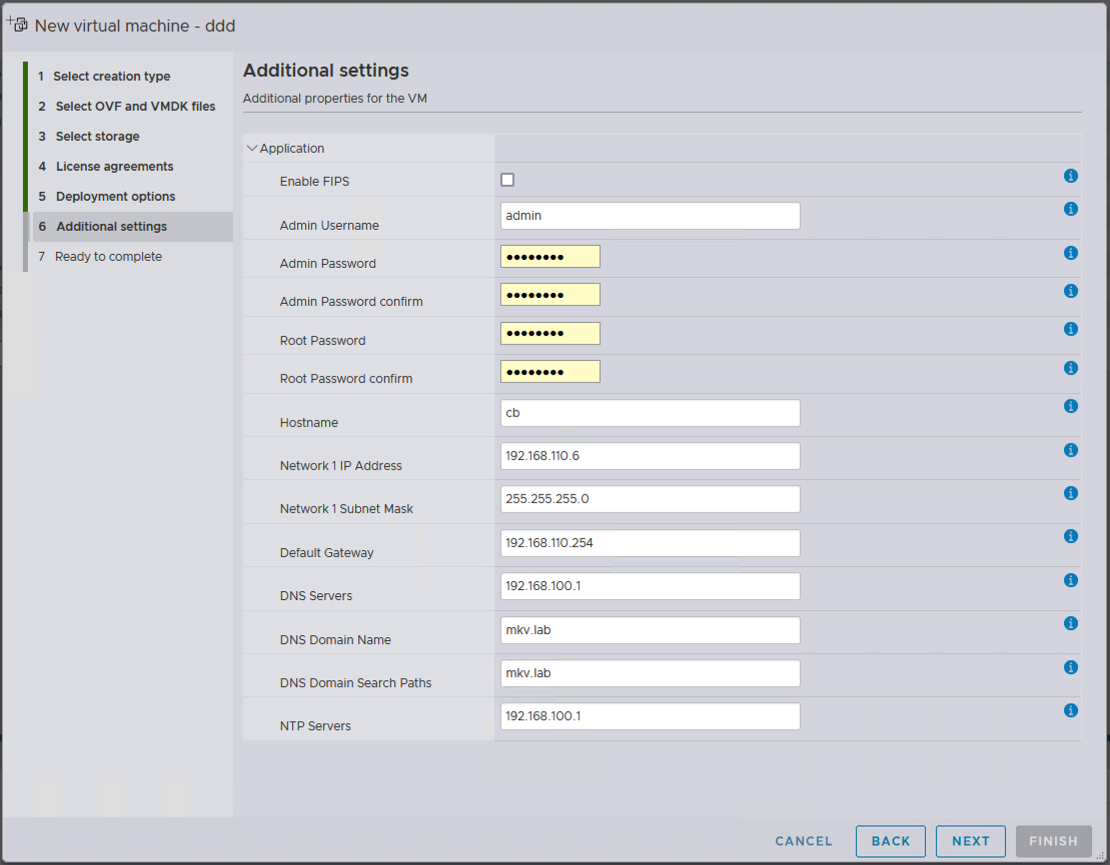
Download and Deploy VCF Cloud Builder cloud builder deployment
Go ahead and download the VCF Cloud Builder and deploy it in your physical host.
Prepare the JSON Config file
When you download the VCF Cloud Builder ISO you will also get the Excel file which collects your VCF deployment parameters and that will be used to upload to Cloud Builder which contains all the information to build the VCF environment. Here you decide about a lot of important things like IPs, size of the component, DNS names, license keys, vDS, and also most importantly VCF architecture to be standard or consolidated. Here I used consolidated architecture so I can use the same management workload domain for my workload since I am just using it for test. After filling the xlsx file with the information, we need to change the xlsx file to JSON to apply the tricks.
To convert the xlsx file to JSON, go ahead and SSH to the cloud builder appliance upload the xlsx file using the WinSCP program, and run the following command (sos) as a root user:
root@cb [ /opt/vmware/sddc-support ]# ./sos --jsongenerator --jsongenerator-input /home/admin/vcf-mkvlab-deployment-parameter.xlsx --jsongenerator-design vcf-mkvlab
A folder called “vcf-mkvlab” will contain my JSON file under “/opt/vmware/sddc-support/cloud_admin_tools/Resources/”. I transfer this file to my machine to make some changes.
Only 1 NSX Manager instead of a cluster of 3
Of course, this is only my lab and I need to save some resources, that is why I am going to change the part of JSON to push only 1 NSX Manager and this is not recommended in production. Go ahead and delete nsx2 and nsx3 in part of the config in “nsxtSpec” and do not forget you need VIP anyway! So mein looks like this:
"nsxtSpec":
  {
    "nsxtManagerSize": "small",
    "nsxtManagers": [
      {
          "hostname": "nsx-01",
          "ip": "192.168.110.9"
      }
    ],
    "rootNsxtManagerPassword": "PASSWORD",
    "nsxtAdminPassword": "PASSWORD",
    "nsxtAuditPassword": "PASSWORD",
    "vip": "192.168.110.10",
    "vipFqdn": "nsx",
    "nsxtLicense": "",
    "transportVlanId": 111
  },
Single ESXi host for the management domain
This is also important for me to configure the management domain with a single ESXi host instead of 4 hosts as a default. The first step is to SSH to Cloud Builder and run the following command to make sure that the bring-up process will accept the 1 host cluster:
root@cb [ /opt/vmware/sddc-support ]# echo "bringup.mgmt.cluster.minimum.size=1" > /etc/vmware/vcf/bringup/application.properties
root@cb [ /opt/vmware/sddc-support ]# systemctl restart vcf-bringup.service
Now we need to update the JSON file and remove the host config for the rest of the hosts under “hostSpecs”.
"hostSpecs": [
    {
      "association": "mkvlab-dc-01",
      "ipAddressPrivate": {
        "ipAddress": "192.168.110.11"
      },
      "hostname": "esxi-01",
      "credentials": {
        "username": "root",
        "password": "PASSWORD"
      },
      "vSwitch": "vSwitch0"
    }
  ]
You need to also append the “hostFailuresToTolerate”: 0 to “clusterSpecs”.
"clusterSpec":
  {
    "clusterName": "mkvlab-cl-01",
    "clusterEvcMode": "",
    "hostFailuresToTolerate": 0,
    "clusterImageEnabled": false,
    "vmFolders": {
      "MANAGEMENT": "mkvlab-mgmt-01-fd-mgmt",
      "NETWORKING": "mkvlab-mgmt-01-fd-nsx",
      "EDGENODES": "mkvlab-mgmt-01-fd-edge"
    },
So now it is time to upload the JSON file to Cloud Builder and run the validation, I did have some small problems to fix, and the good point is you can check the possible errors and fix in the JSON file and upload and rerun the validation. So this is the result:
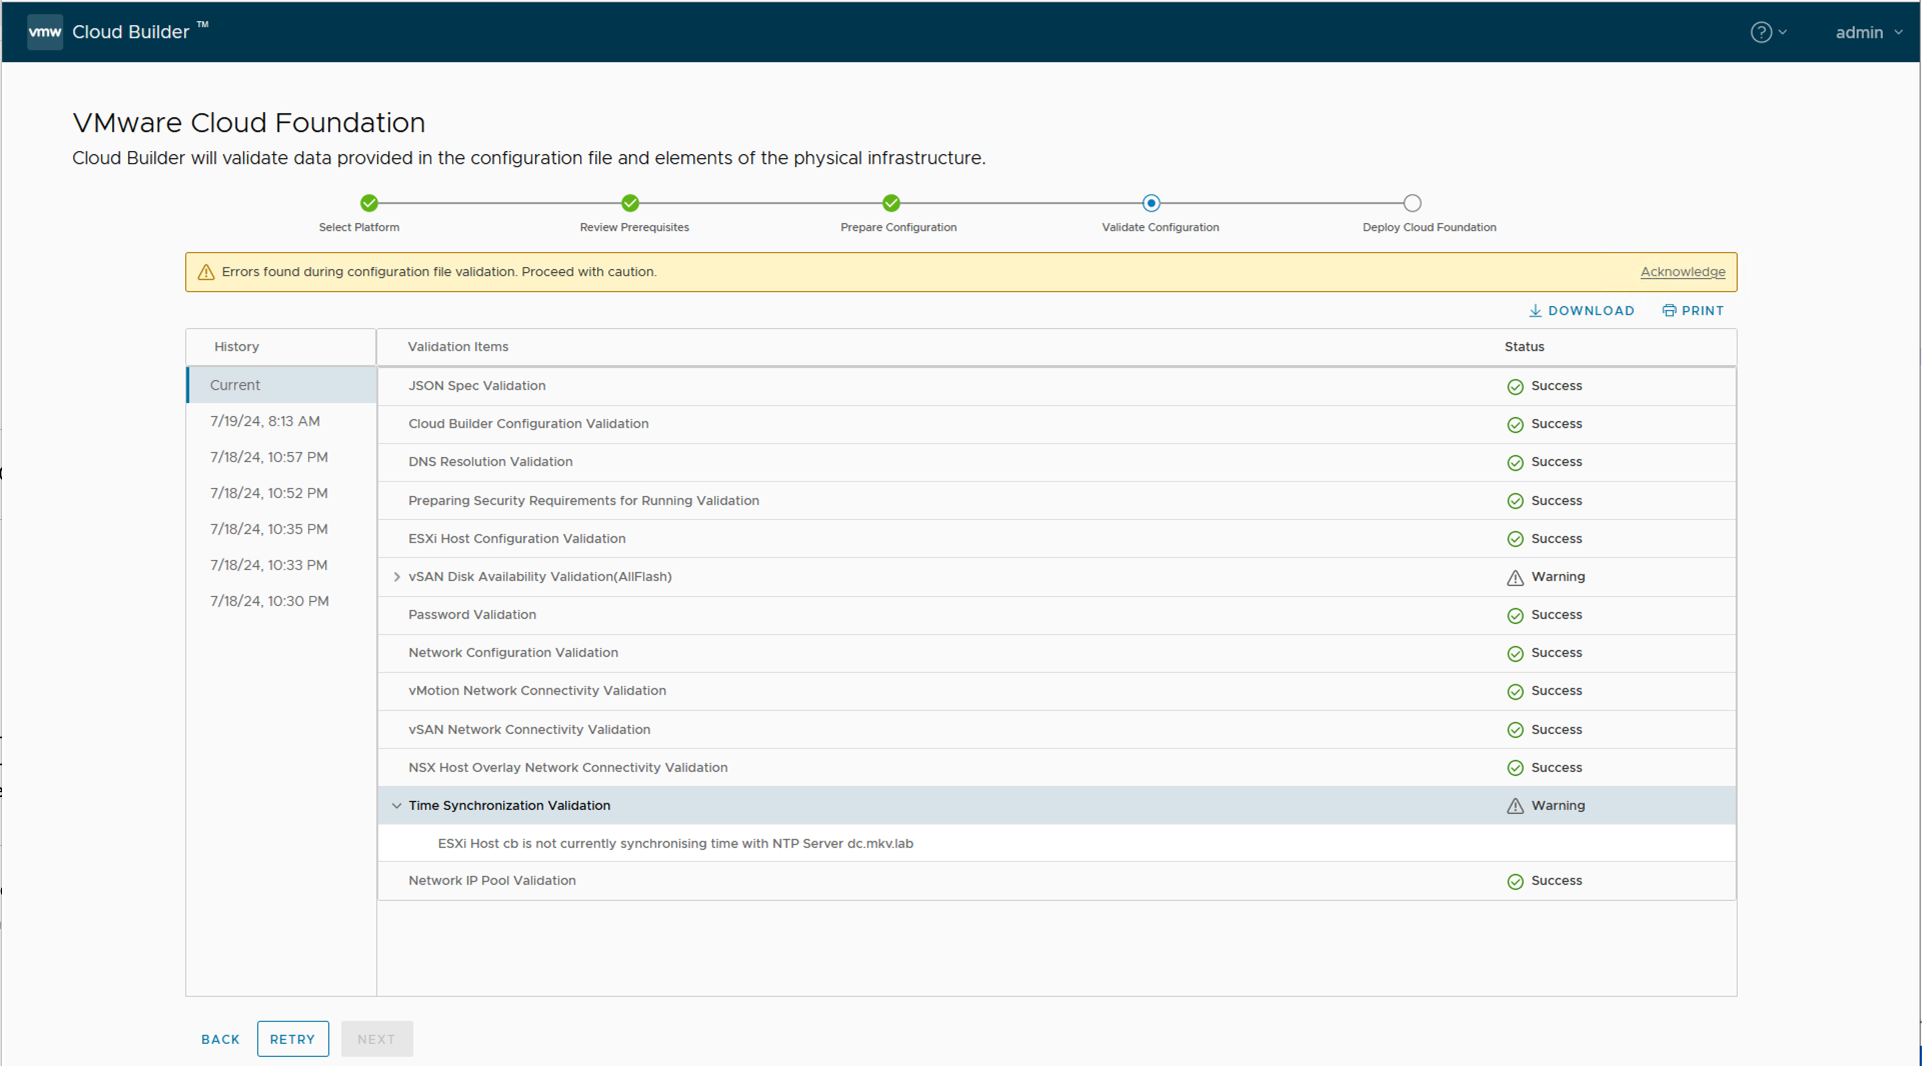
validation
After validation is successful and no error exists we can run the deployment or what we call in VCF the bring-up process, again I had some issues and errors during the bring-up process and I had to assign the host to VDS manually (which is great, and worked) and once since I had an error in VIP so I had to re-upload the JSPN file again which I will also explain in this article. But after all and about 2-3 hours the deployment was finished successfully.
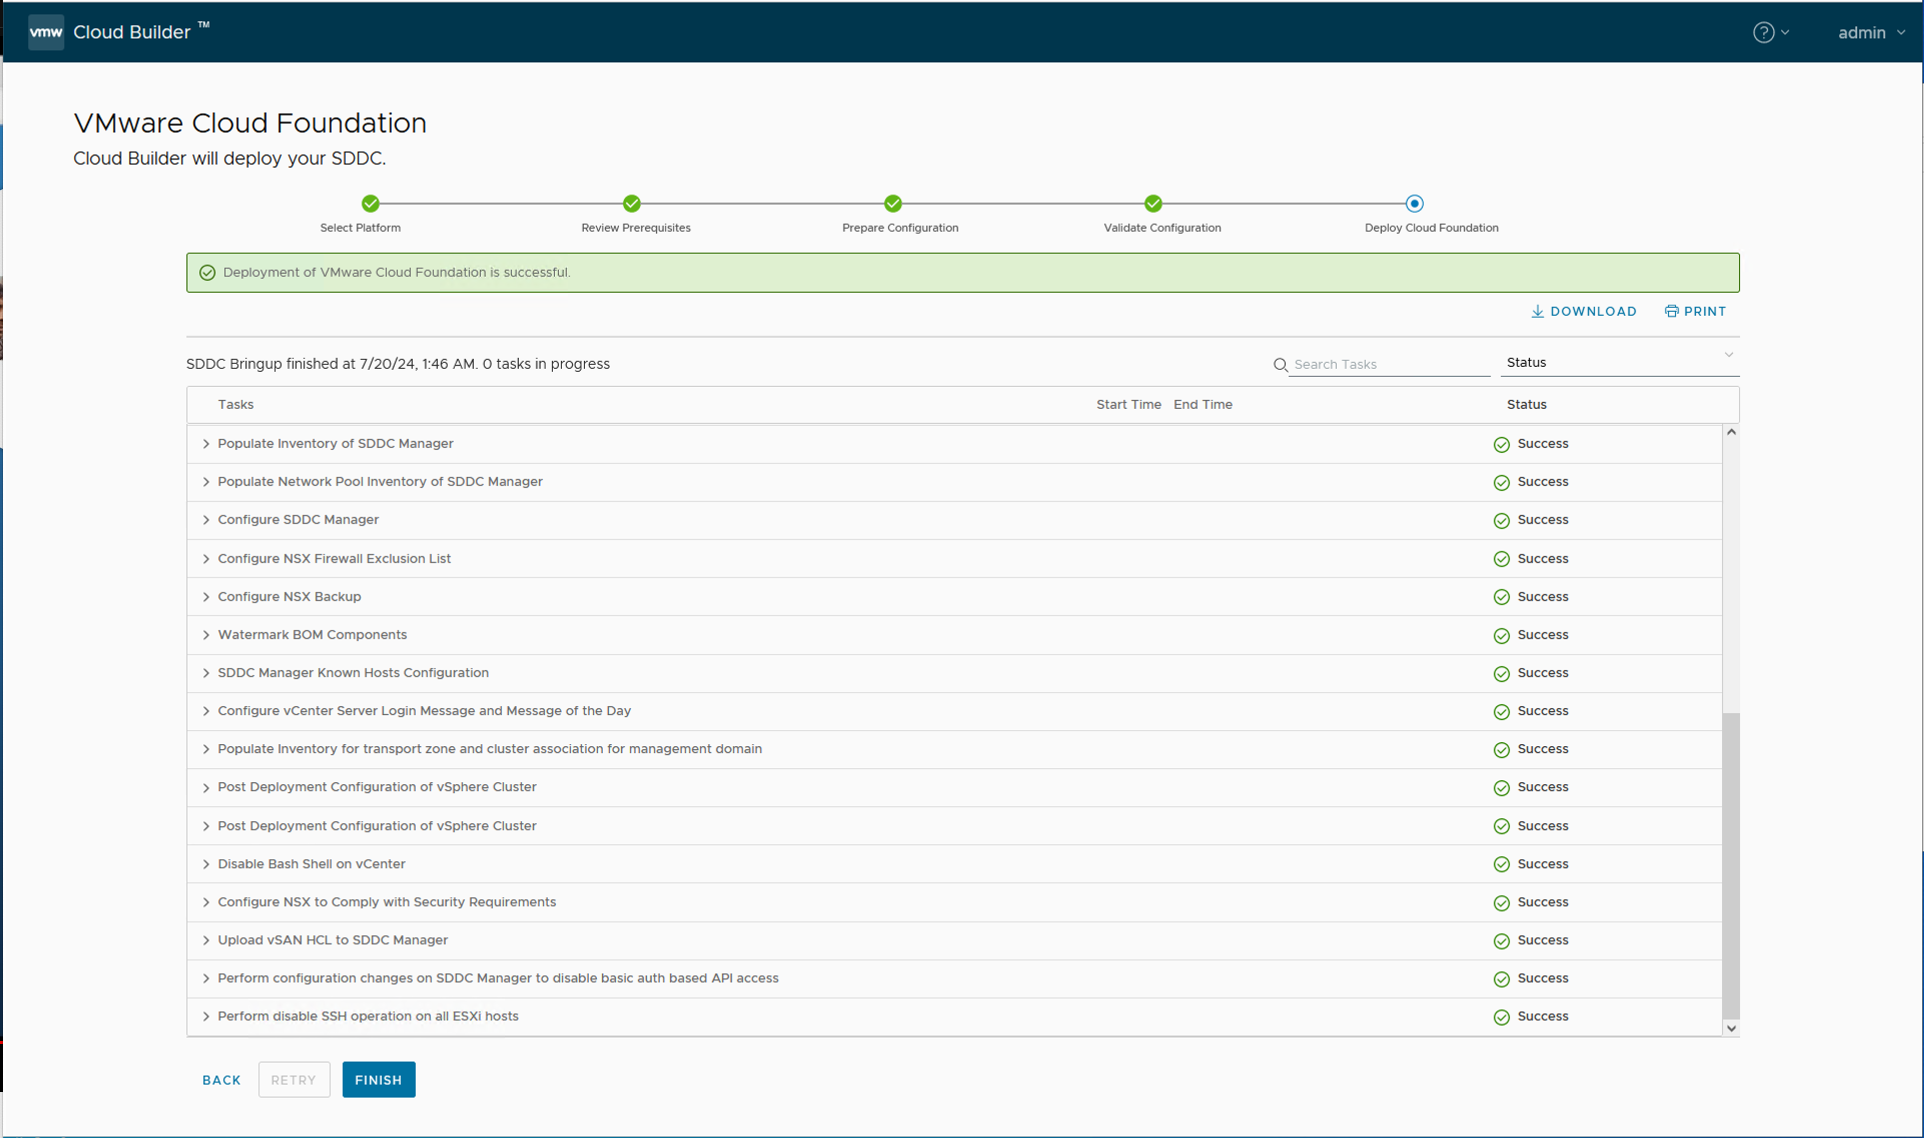
deployment
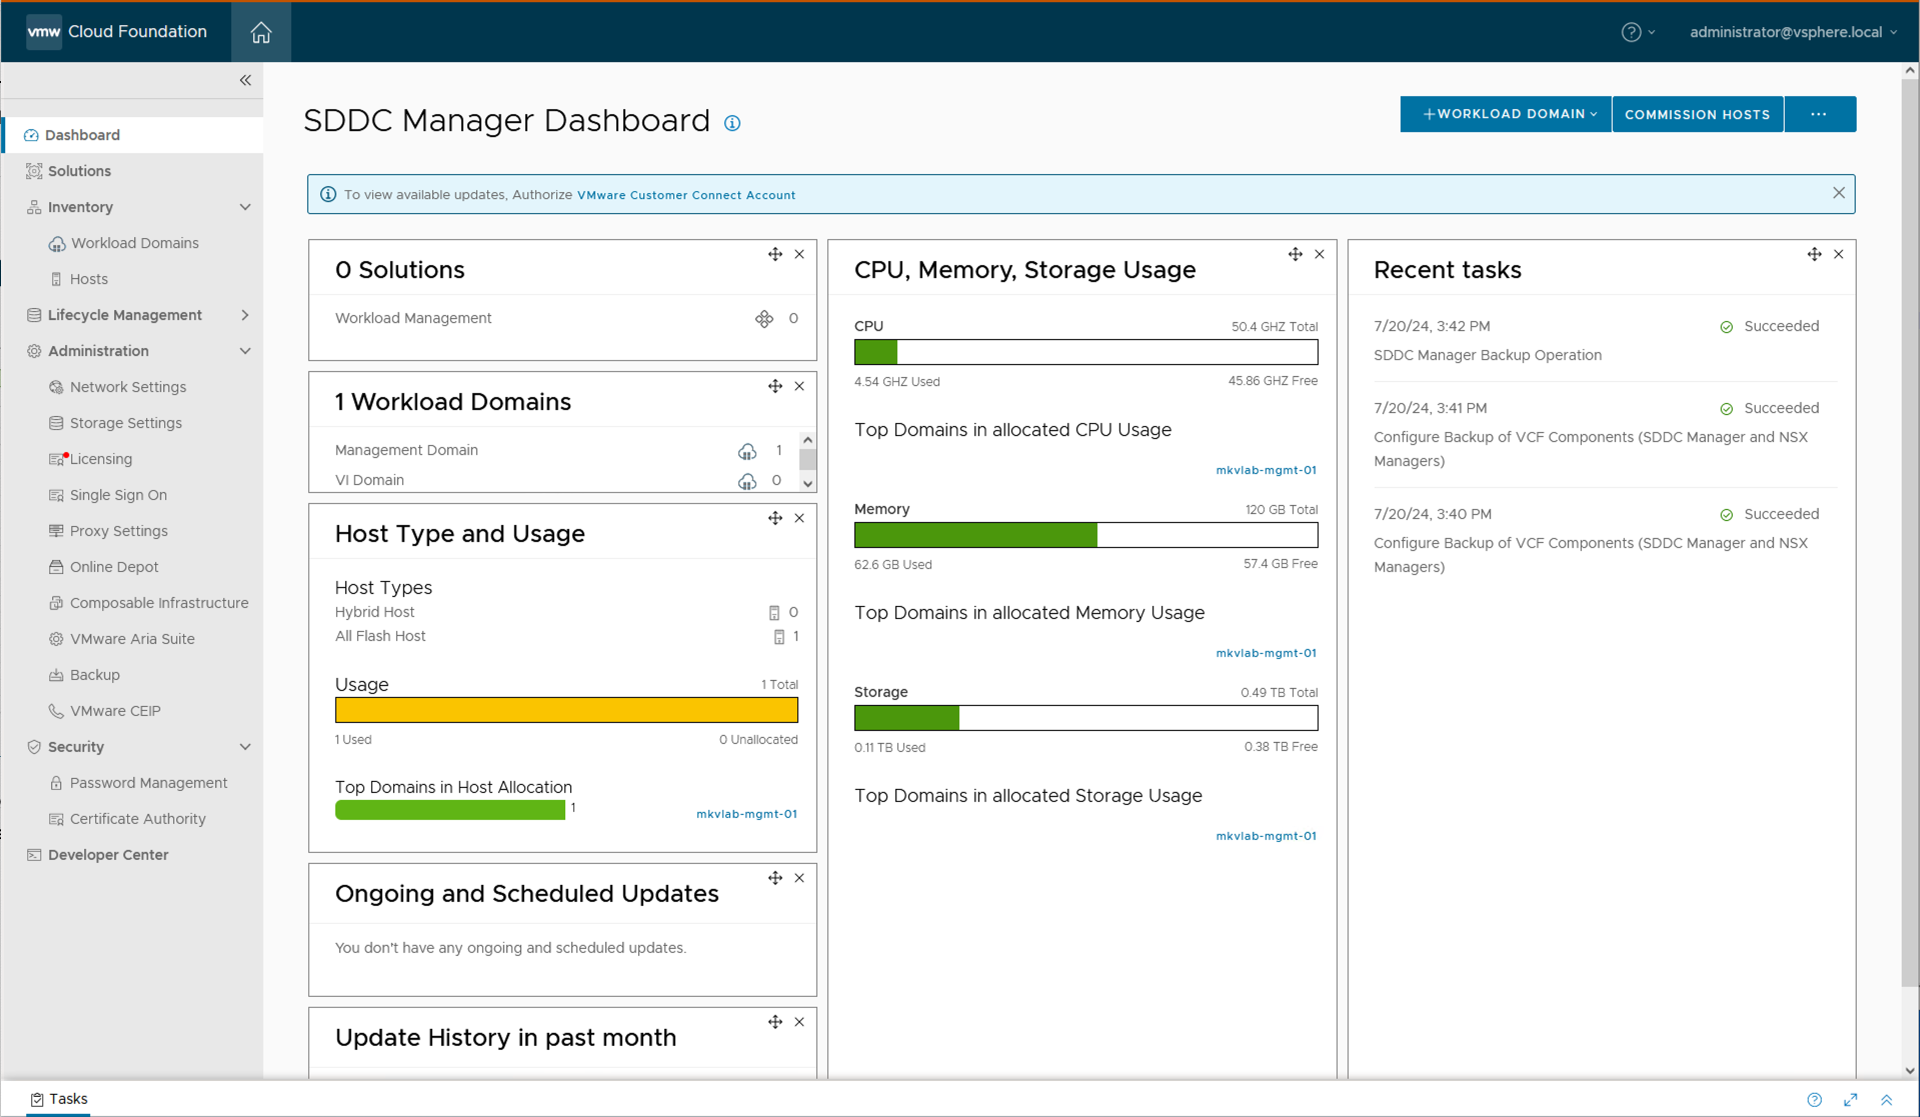
Time to log in to SDDC Manager and check if everything works fine also assign the licenses if you haven’t done so through the xlxs file. I also configured a backup and identity provider which I will link to a YouTube video.
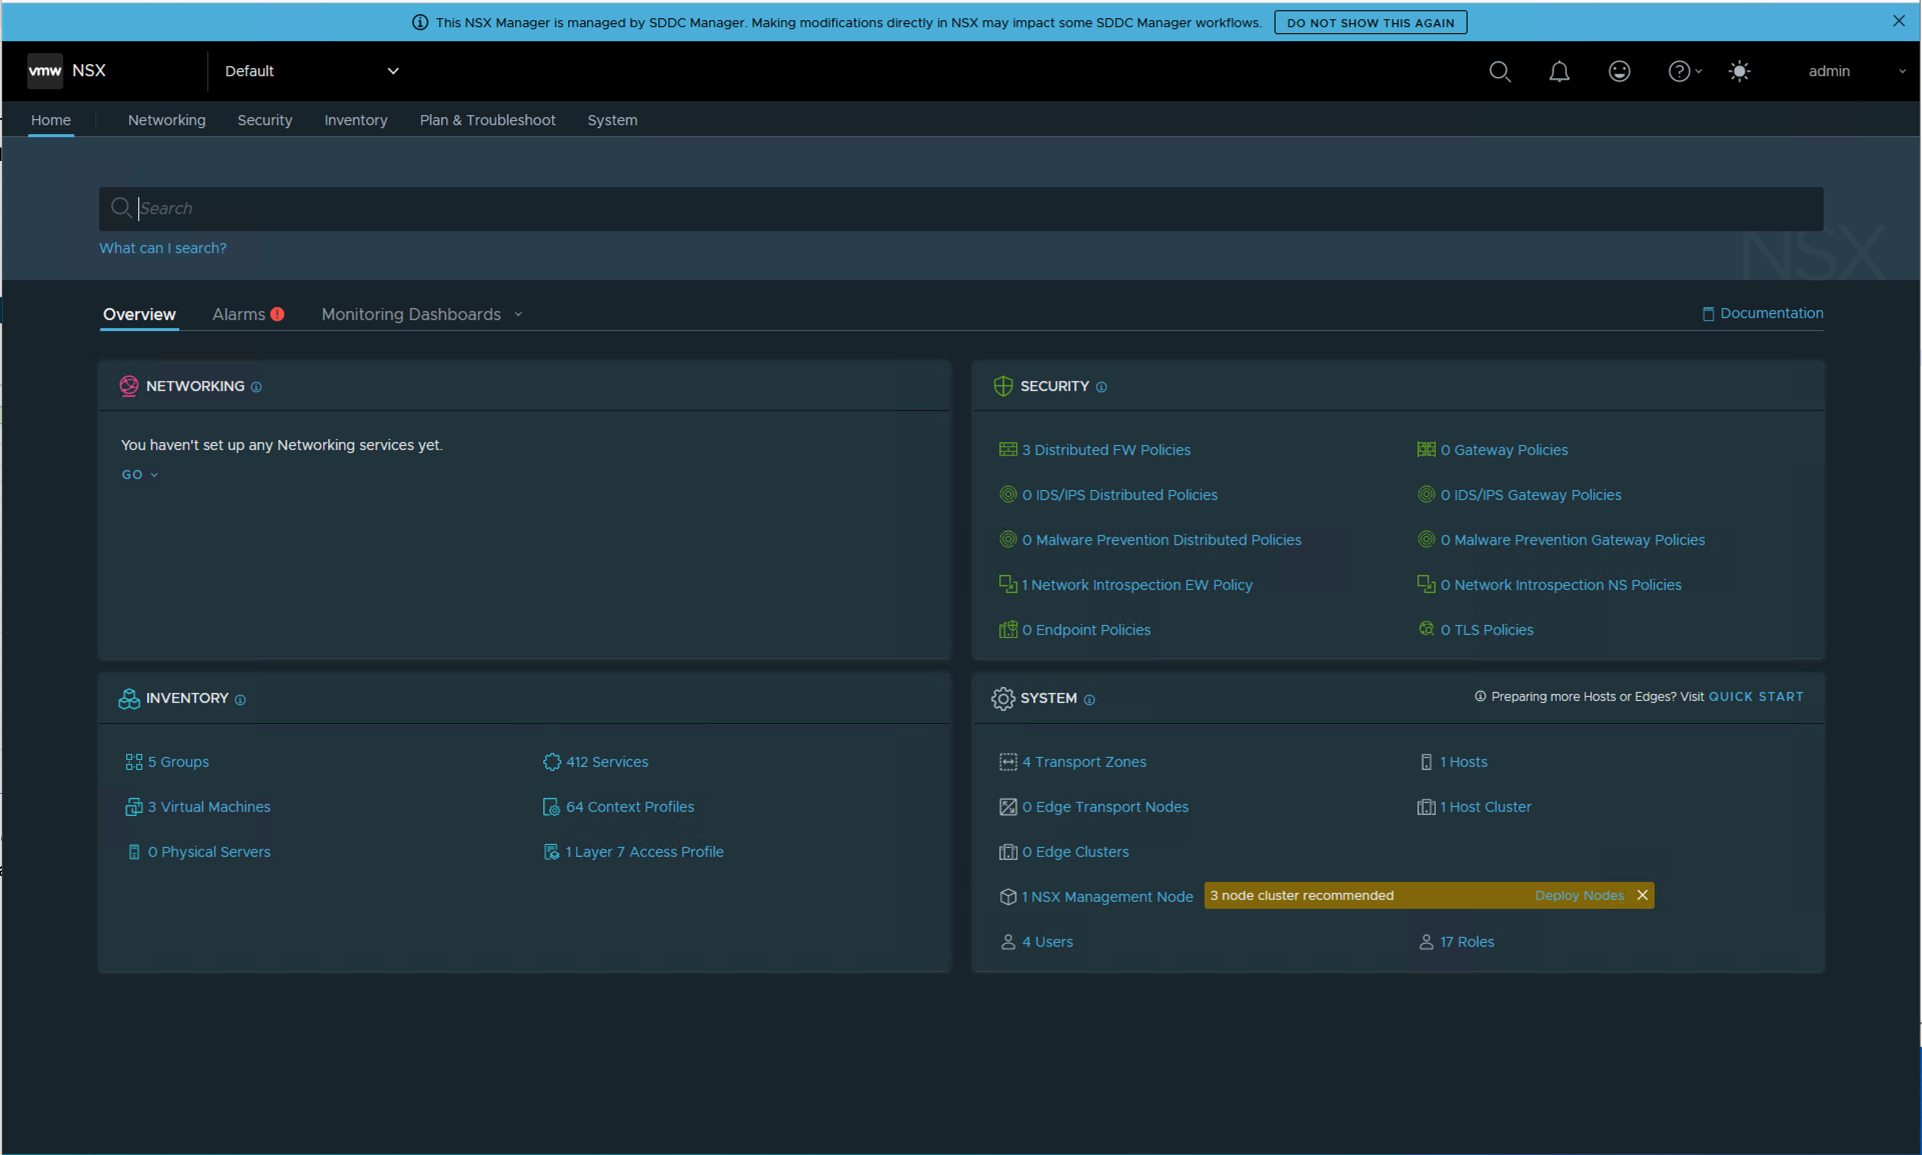
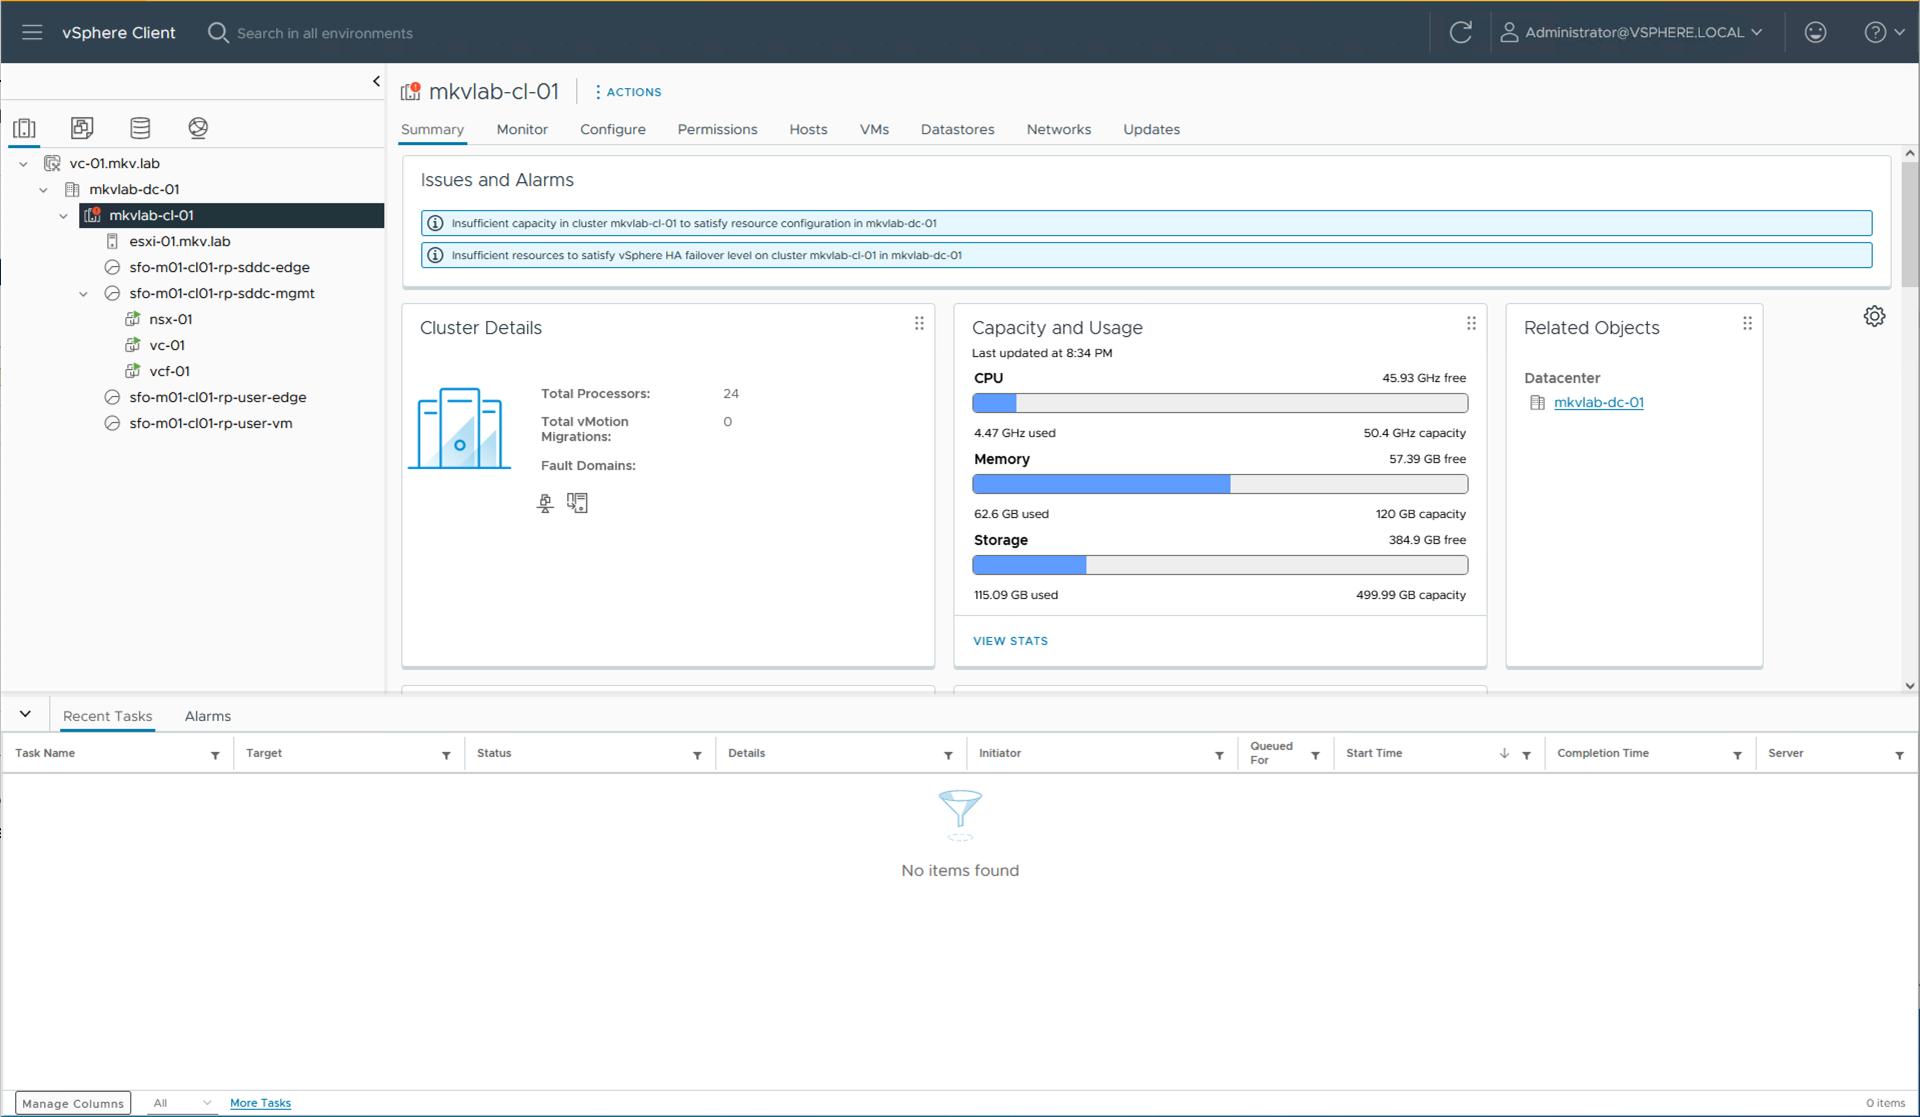
sddc manager nsx manager vcenter